
Introduction
Uploading a customer list to Google Ads is a powerful way to enhance your advertising efforts by targeting specific audiences who have already engaged with your business. This process allows you to create personalized ad campaigns tailored to your existing customers, increasing the likelihood of conversion and improving your return on investment (ROI). In this guide, we will walk you through the steps to upload a customer list to Google Ads, ensuring your campaign is set up for success.
Step 1: Prepare Your Customer List
Before you can upload a customer list to Google Ads, you need to prepare the list according to Google’s requirements:
1) Data Collection: Collect customer data such as email addresses, phone numbers, first and last names, country, and ZIP codes. Ensure the data is accurate and up-to-date to maximize match rates.
2) Format the Data: Google Ads accepts customer data in specific formats. The most common format is a CSV file, which you can create using Excel or Google Sheets. Each piece of data should be in a separate column with headers such as “Email,” “Phone,” “First Name,” “Last Name,” etc.
3) Hash the Data (Optional): For added security, you can hash your data using the SHA-256 algorithm before uploading it to Google Ads. Google will also hash the data on their end if it isn’t hashed when uploaded.
4) Compliance: Make sure you comply with Google’s data policies, including obtaining consent from your customers to use their data for advertising purposes.
Step 2: Log into Your Google Ads Account
1) Access Google Ads: Go to Google Ads and log into your account using your credentials.
2) Navigate to Tools & Settings: In the top right corner of the Google Ads interface, click on the “Tools & Settings” icon (which looks like a wrench).
3) Select Audience Manager: Under the “Shared Library” section, click on “Audience Manager.” This is where you will manage your audience lists, including customer lists.
Navigate to google ads audience manager 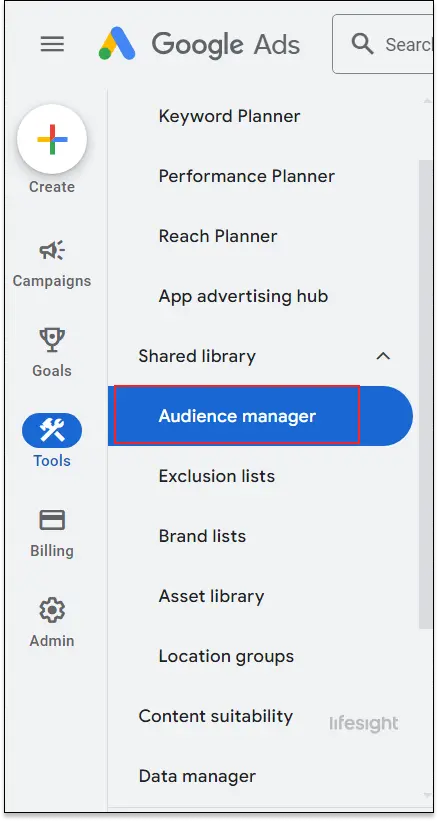
Step 3: Create a New Customer List
1) Click on ‘Audience Lists’: Once in Audience Manager, click on the “Audience Lists” tab. Here, you’ll see any existing lists you’ve created.
2) Create a New List: Click on the blue “+” button to create a new list. Choose “Customer List” from the options provided.
3) Name Your List: Give your customer list a name that clearly describes its purpose, such as “Recent Purchasers” or “Newsletter Subscribers.”
4) Upload Your File: Click on “Upload” to select the CSV file containing your customer data. After selecting your file, Google Ads will prompt you to map the data to the correct fields (e.g., map the “Email” column to “Email” in Google Ads).
5) Membership Duration: Set the duration for how long you want users to remain on your list. The default is 30 days, but you can customize it based on your campaign’s needs.
6) Customer Data Platform Integration: If you use a customer data platform (CDP) or customer relationship management (CRM) tool, you may have the option to integrate directly with Google Ads to automate this process.
create-a-new-customer-list-in-google-ads 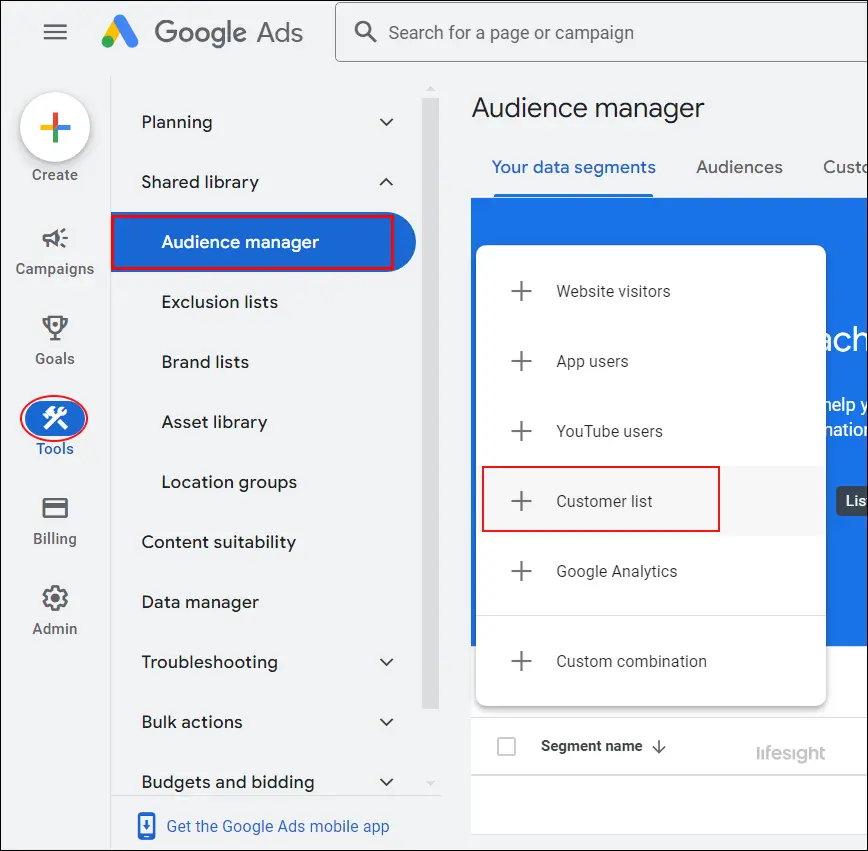
Step 4: Review and Upload Your List
Before finalizing, Google Ads will provide a preview of how the data is mapped, so take a moment to double-check everything for accuracy. Once confirmed, click “Upload and Create” to upload your list, the system will process the data, which may take a few minutes. After uploading, Google Ads will attempt to match your data with its users, with the match rate depending on the quality and recency of the data.
Step 5: Use Your Customer List in a Campaign
1) Create a Campaign: Navigate to the “Campaigns” tab and create a new campaign or edit an existing one.
2) Select Your Audience: During the campaign setup, you’ll have the option to select your audience. Choose “Customer List” and select the list you’ve just uploaded.
3) Set Your Bid Adjustments: Consider setting bid adjustments to prioritize customers who are more likely to convert. For example, you might increase your bids for users on your “Recent Purchasers” list.
4) Launch Your Campaign: After configuring the rest of your campaign settings, launch your campaign. Your ads will now be targeted to the users in your customer list.
Step 6: Monitor and Optimize Your Campaign
Monitor your campaign’s performance by tracking key metrics like impressions, clicks, conversions, and cost per conversion. Based on this data, you may need to adjust your targeting, bids, or ad creatives to enhance results. Additionally, consider running A/B tests with different customer lists or ad creatives to determine the most effective strategies.
Summary
Uploading a customer list to Google Ads is a strategic way to engage with an audience that is already familiar with your brand. By following the steps outlined in this guide, you can create highly targeted campaigns that drive conversions and improve your overall marketing efficiency. Remember to monitor your campaign’s performance and make adjustments as needed to maximize your ROI.
Free essential resources for success


Discover more from Lifesight


