
Introduction
Tracking website visitors is essential for understanding user behavior, optimizing content, and improving overall site performance. Google Analytics is a powerful tool that provides detailed insights into how visitors interact with your website. This guide will walk you through the step-by-step process of setting up Google Analytics to track website visitors.
Step 1: Create a Google Analytics Account
To start tracking your website visitors, you need a Google Analytics account. If you don’t already have one, go to Google Analytics and click “Start for free.” Follow the prompts to sign up using your Google account.
login-into-google-analytics 
Step 2: Set Up a Property
Once your account is created, you need to set up a property for the website you want to track. In the Google Analytics dashboard, click on the “Admin” tab at the bottom left. Under the “Property” column, click “Create Property.” Enter the property name (usually your website’s name), select the reporting time zone, and choose the currency. Click “Next” to proceed.
Step 3: Set Up a Data Stream
After setting up the property, you need to create a data stream to collect data from your website. Select “Web” as the platform, and enter your website’s URL and stream name. Click “Create Stream” to generate a tracking ID and the Global Site Tag (gtag.js) code.
create a data stream in google analytics 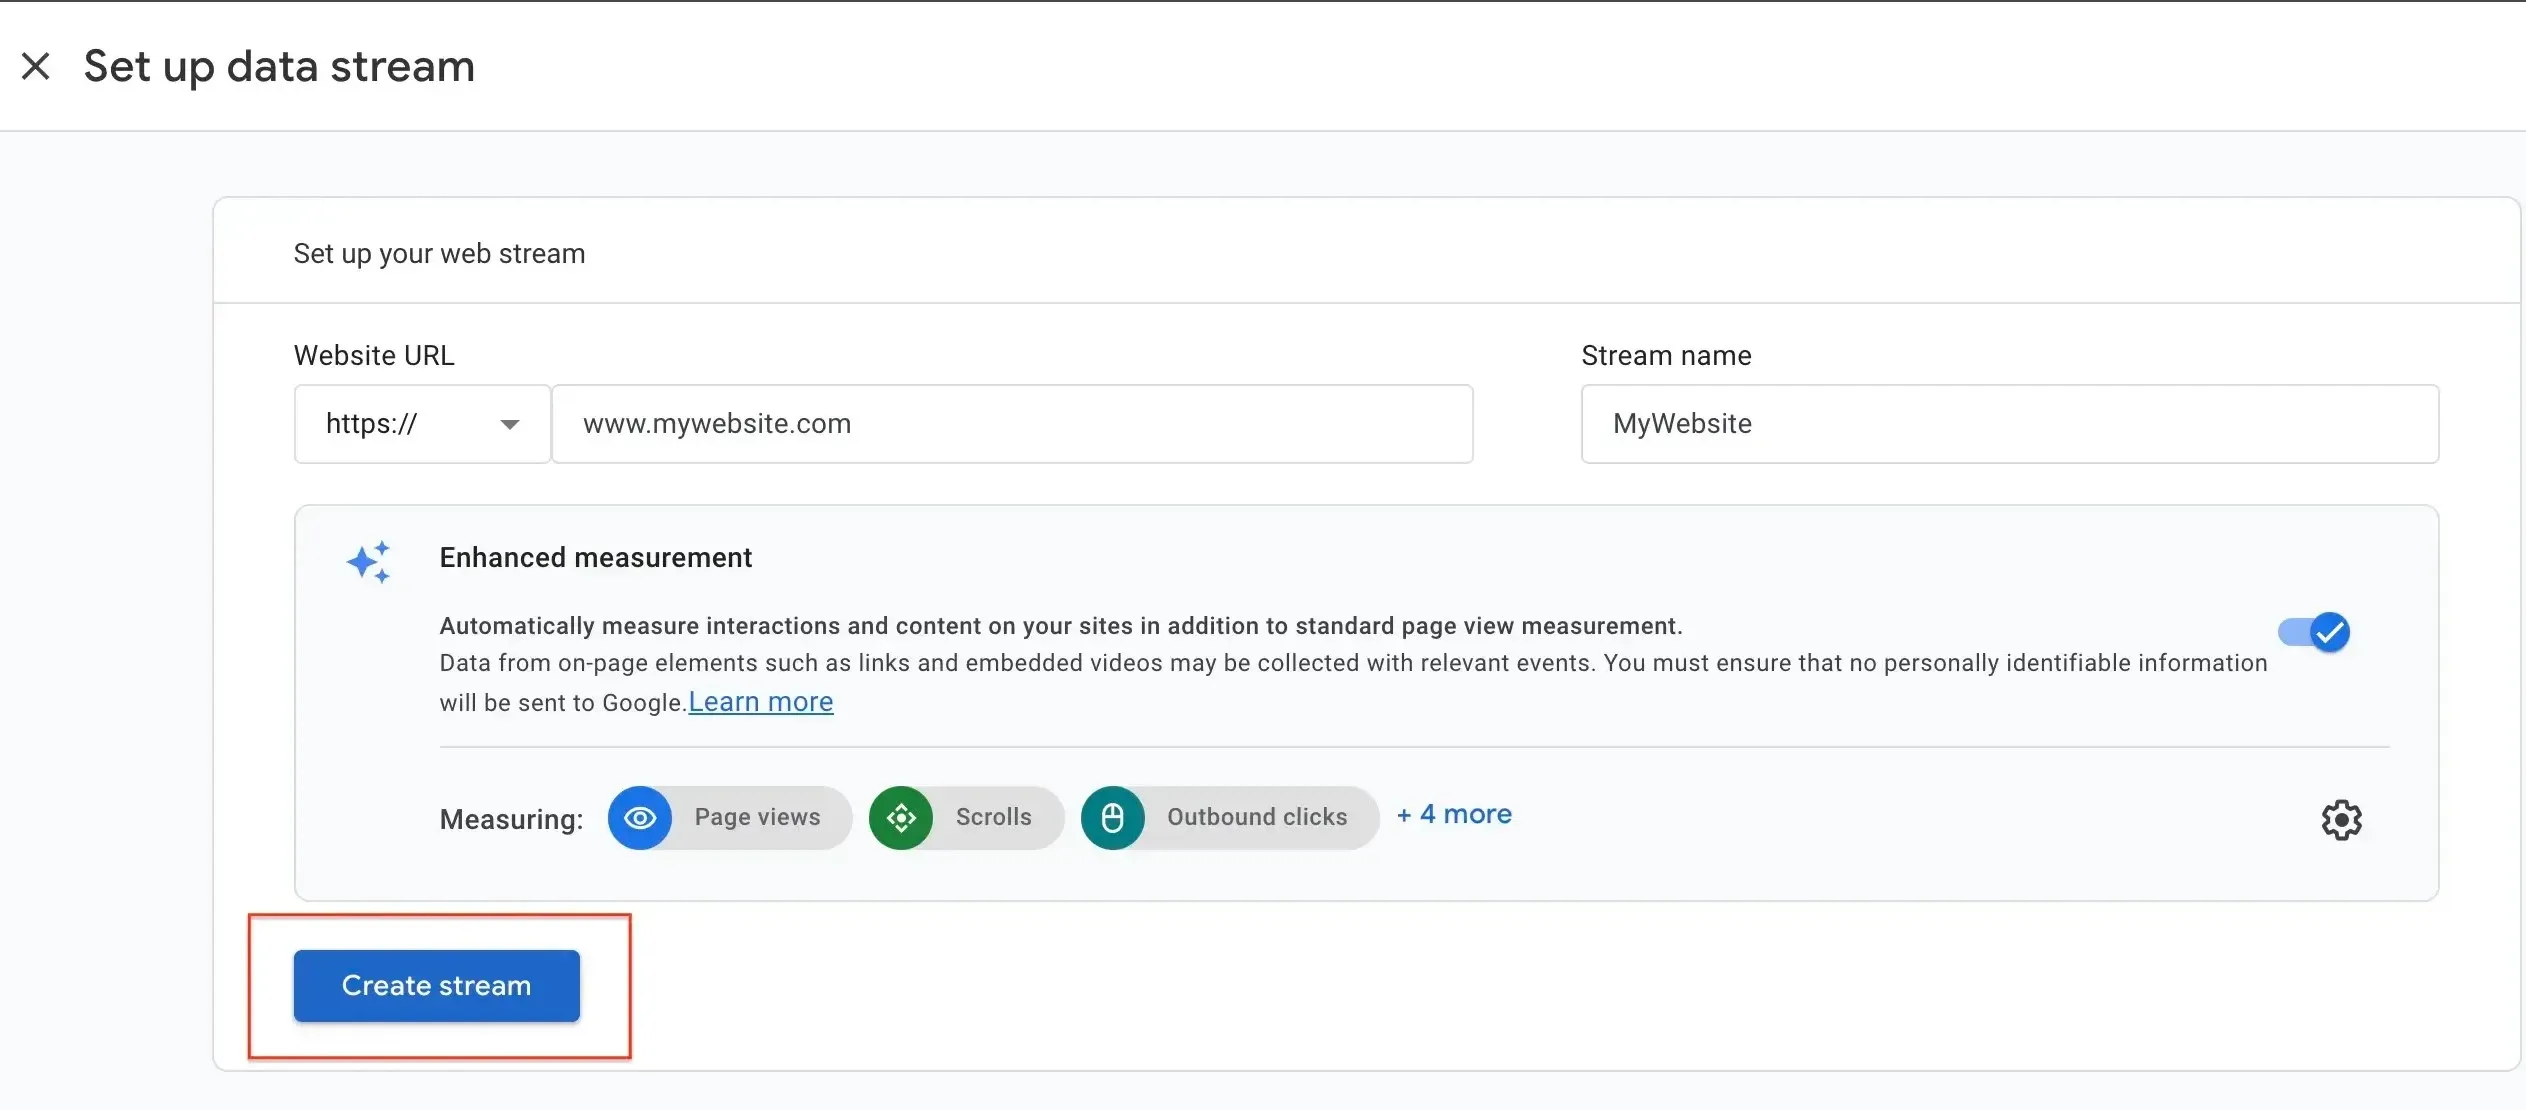
Step 4: Install the Tracking Code
To start tracking visitors, you need to install the Global Site Tag on every page of your website. Copy the provided gtag.js code from your Google Analytics setup page. If you’re using a website builder or content management system (CMS) like WordPress, follow the specific instructions for adding the tracking code to your site. Generally, you’ll paste the code into the <head> section of your HTML.
install-the-global-site-tag 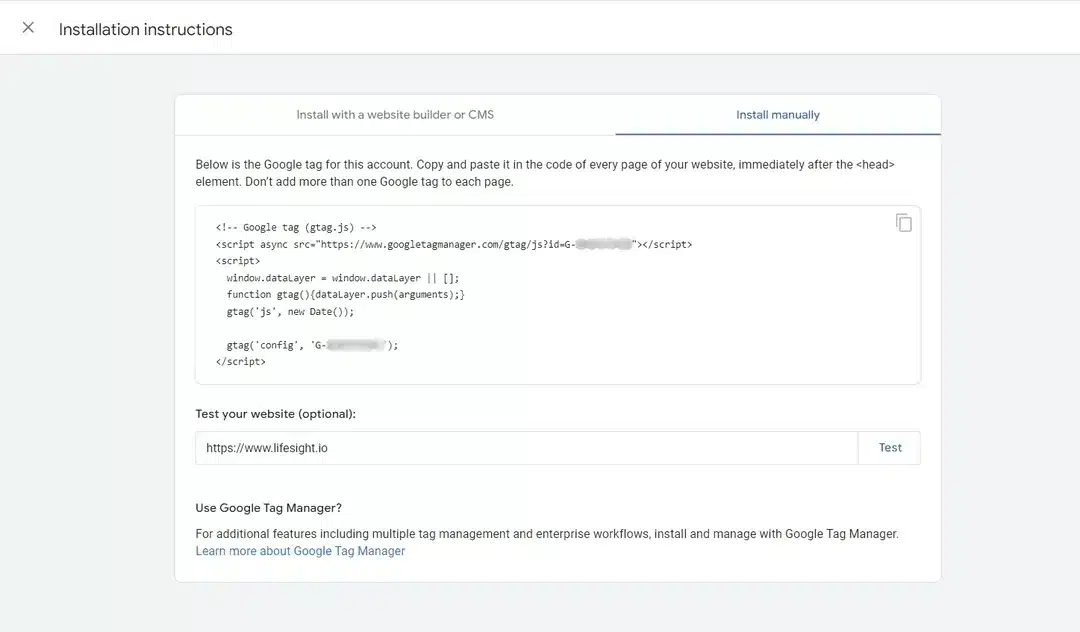
Step 5: Verify the Installation
Once the tracking code is installed, verify that Google Analytics is receiving data. In the Google Analytics dashboard, go to “Realtime” > “Overview.” Visit your website, and you should see your activity reflected in the real-time report. This confirms that the tracking code is working correctly.
Step 6: Set Up Goals
Goals in Google Analytics help you track specific actions you want visitors to take on your website, such as making a purchase, signing up for a newsletter, or completing a contact form. To set up goals, go to “Admin” > “Goals” > “New Goal.” Follow the prompts to define your goal, choose the goal type, and configure the goal details.
Common Goal Types:
- Destination: Track when a visitor lands on a specific page, such as a thank-you page after a form submission.
- Duration: Track sessions that last a certain amount of time or longer.
- Pages/Screens per Session: Track users who visit a certain number of pages or screens in a session.
- Event: Track interactions like clicks, downloads, or video plays.
define-new-goals-in-google-analytics 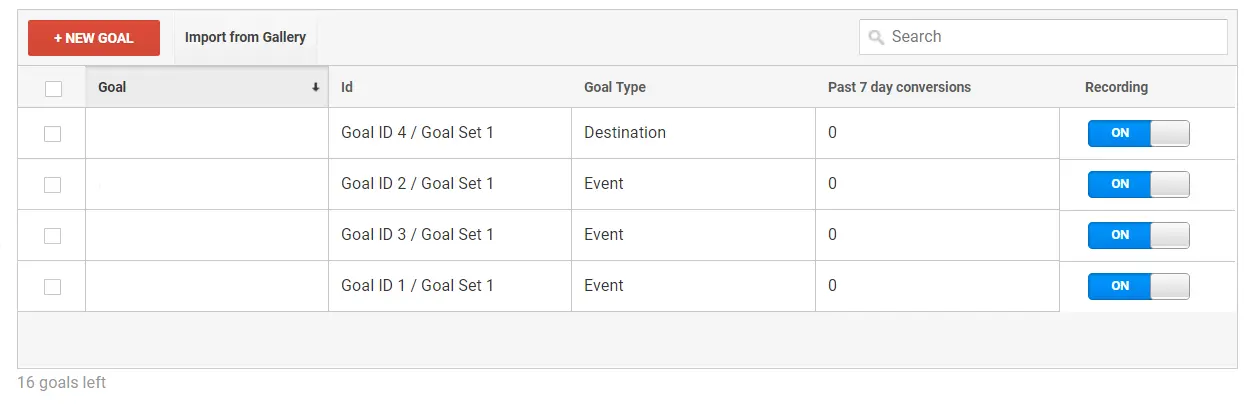
Step 7: Enable Enhanced Ecommerce (Optional)
For e-commerce websites, enabling Enhanced Ecommerce provides detailed insights into product performance, shopping behavior, and checkout process. To enable Enhanced Ecommerce, go to “Admin” > “Ecommerce Settings” under the property view. Toggle the switch to enable Ecommerce and Enhanced Ecommerce Reporting.
Setting Up Ecommerce Tracking:
- Add Ecommerce tracking code to your website to track transactions, product impressions, and other ecommerce interactions.
- Use Google Tag Manager for easier implementation if you’re not comfortable editing your website’s code directly.
Step 8: Set Up Custom Dimensions and Metrics
Custom dimensions and metrics allow you to track additional data specific to your business needs. To set these up, go to “Admin” > “Custom Definitions” > “Custom Dimensions” or “Custom Metrics.” Click “New Custom Dimension” or “New Custom Metric” and configure the parameters.
Examples of Custom Dimensions:
- User Type: Track new vs. returning visitors.
- Customer ID: Track logged-in users by their unique ID.
- Content Type: Track different types of content (e.g., blog posts, product pages).
setup custom dimensions and custom metrics 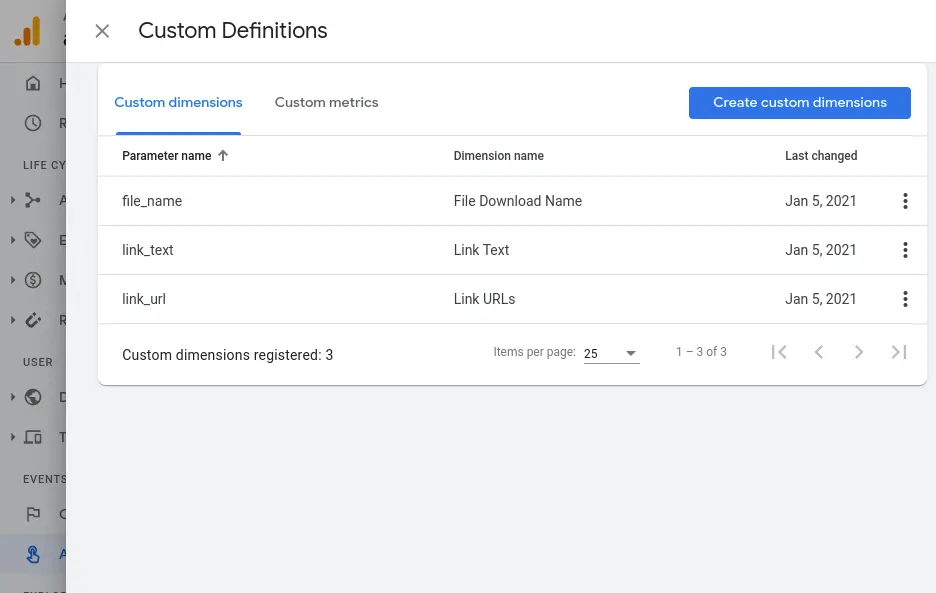
Step 9: Analyze the Data
With Google Analytics properly set up, you can start analyzing the data to gain insights into your website visitors. Use the various reports available in the dashboard to understand user demographics, behavior, acquisition channels, and more.
Key Reports to Explore:
- Audience Overview: Understand who your visitors are.
- Acquisition Overview: Learn how visitors find your website.
- Behavior Overview: See what visitors do on your site.
- Conversion Overview: Track goal completions and ecommerce performance.
Step 10: Regularly Review and Optimize
Tracking website visitors is an ongoing process. Regularly review your Google Analytics data to identify trends, spot issues, and make data-driven decisions to optimize your website’s performance. Adjust your goals, custom dimensions, and tracking setup as needed to ensure you’re capturing all relevant data.
Summary
Tracking website visitors using Google Analytics provides invaluable insights into user behavior and site performance. By following these steps, you can set up and configure Google Analytics to effectively track and analyze your website traffic. Regularly reviewing and optimizing your tracking setup will help you make informed decisions and improve your marketing strategies.
Free essential resources for success


Discover more from Lifesight


