Introduction:
Google Tag Manager (GTM) is a powerful tool that simplifies the process of adding and managing tags on your website. Ensuring that GTM is correctly configured is crucial for accurate data tracking and analytics. This step-by-step guide will walk you through the process of testing Google Tag Manager to guarantee its proper functionality, providing confidence in the data collected for your website.
Step 1: Access Google Tag Manager Account
Begin by logging into your Google Tag Manager account. If you don’t have an account, you’ll need to create one to access the platform.
Step 2: Select the Container to Test
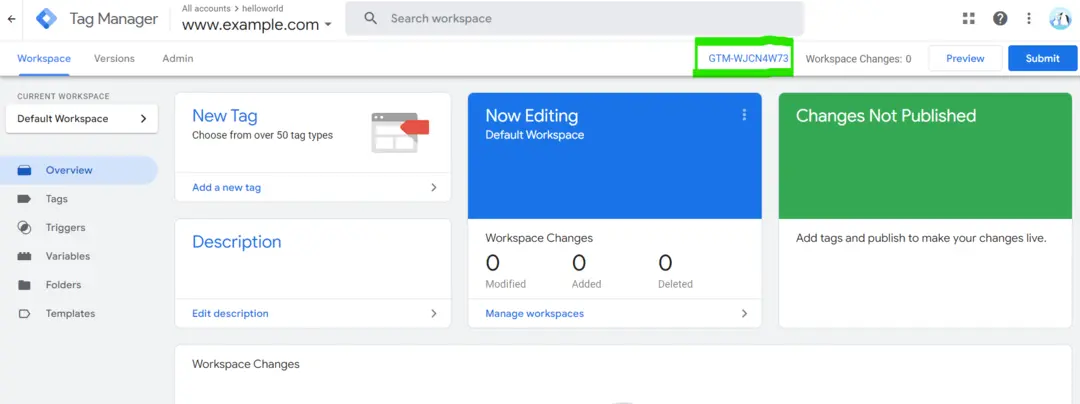
In the Google Tag Manager dashboard, choose the container that corresponds to the website you want to test. Click on the container name to access the container workspace.
choose-the-container-to-test
Step 3: Preview Mode
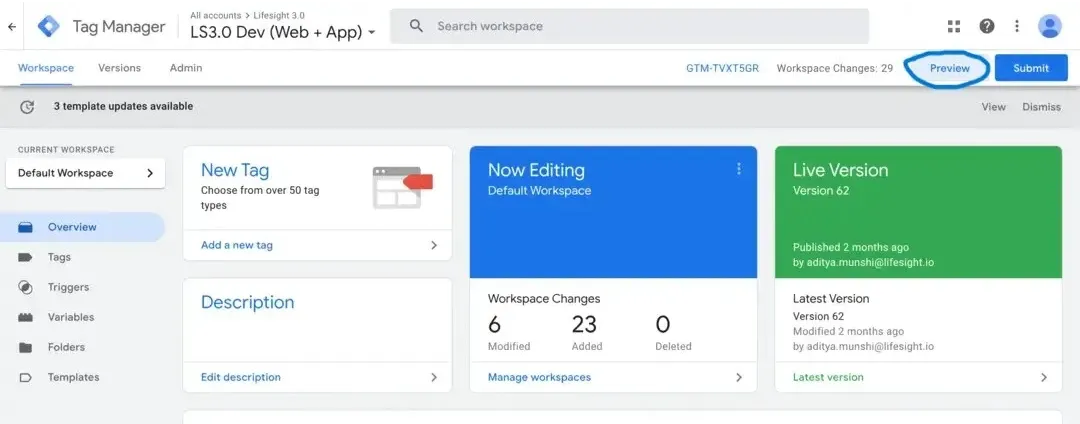
Navigate to the top right corner of the GTM interface and locate the “Preview” button. Click on it to enter Preview mode. This mode allows you to view and test changes before they are published live on your website.
preview-mode-in-google-tag-manager
Step 4: Publish Container Changes (if needed)
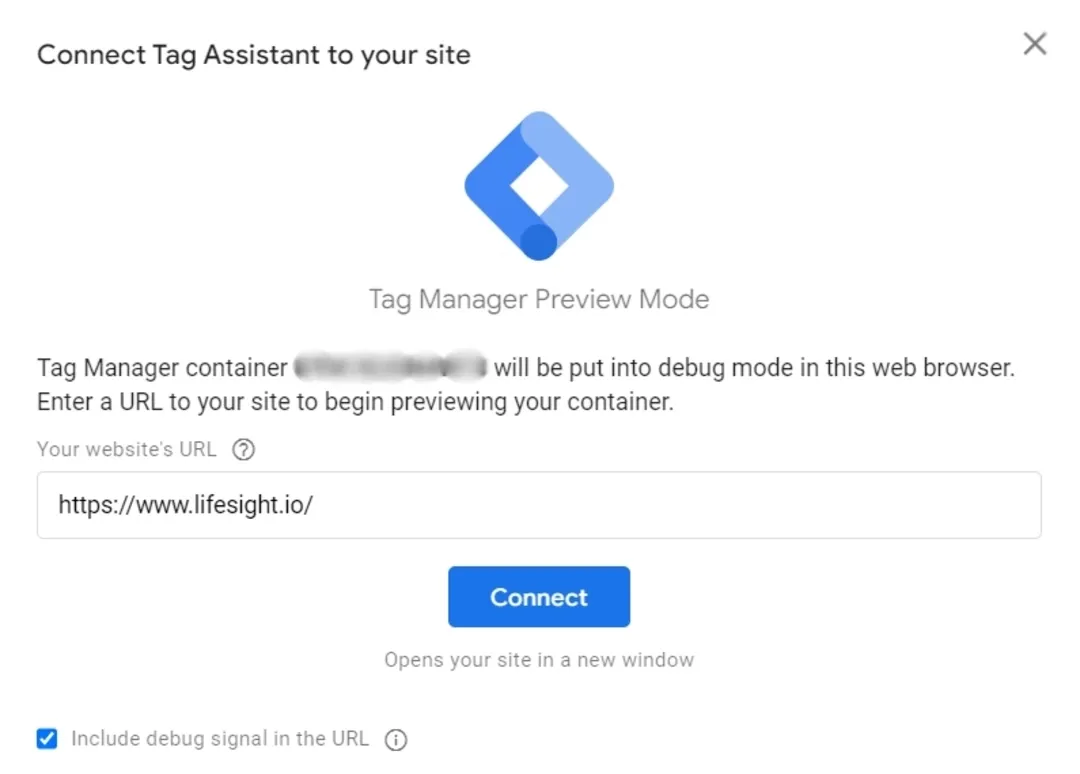
If you’ve made recent changes to your container that haven’t been published, GTM will prompt you to publish them before entering Preview mode. Confirm and publish the changes if necessary.
Step 5: Preview Panel Activation
Once in Preview mode, a new browser tab or window will open, displaying the Preview panel at the bottom of your website. This panel provides information about the tags, triggers, and variables firing on the current page.
Step 6: Test Tags and Triggers
Navigate through your website as a typical user would. Test specific pages and interactions to trigger the tags you’ve set up in GTM. In the Preview panel, you’ll see which tags fire, helping you confirm that they’re working correctly.
test-tags-and-triggers-in-gtm
Step 7: Debug Mode
Activate GTM’s Debug mode for a more detailed view of the data being sent. In the Preview panel, click on “Enable Debug.” This opens the debug console, providing real-time information about the tags firing, variables, and any errors detected.
enable-debugging-mode
Step 8: Check Variables
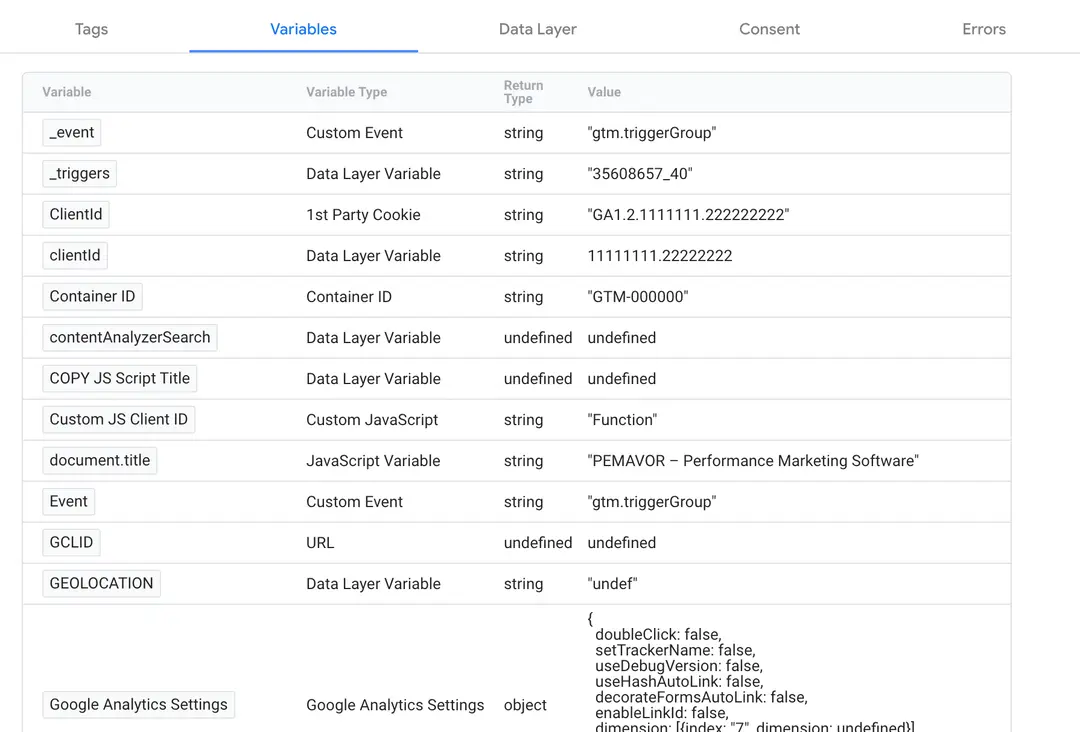
Verify that the variables configured in GTM are capturing the correct data. In the debug console, inspect the values of variables as they fire. This ensures that the data being sent to your analytics tools is accurate and aligned with your tracking requirements.
check-variables-in-gtm
Step 9: Review Errors
If there are errors in your configuration, the debug console will highlight them. Address any error messages to ensure smooth and accurate data tracking. Common errors may include issues with tag firing conditions or variable configurations.
Step 10: Test Across Browsers
Perform the testing process across different browsers to ensure compatibility. GTM may behave slightly differently in various browsers, and testing across multiple platforms helps identify and resolve any discrepancies.
Step 11: Mobile Responsiveness Testing
If your website is responsive or has a separate mobile version, test GTM on mobile devices. Ensure that tags fire correctly and that data is tracked accurately on mobile platforms.
Step 12: Test E-commerce Tracking (if applicable)
For e-commerce websites, pay special attention to testing e-commerce tracking tags. Verify that product views, add to cart actions, and purchase events are captured accurately in your analytics tools.
Step 13: Check DataLayer Pushes
If you’re using the dataLayer for custom data, check that dataLayer pushes are functioning as expected. Monitor the dataLayer in the debug console to ensure that relevant data is being pushed when specific interactions occur on your website.
Step 14: End Preview Mode
Once you’ve thoroughly tested GTM and are confident in its functionality, end Preview mode. Click on “Submit” in the top right corner of the GTM interface to publish your changes live on your website.
Step 15: Regular Testing and Monitoring
Make testing a regular practice, especially when making significant changes to your website or GTM configuration. Regular testing helps catch issues early and ensures the ongoing accuracy of your data tracking.
Summary
Testing Google Tag Manager is an essential part of maintaining accurate data tracking on your website. By following these steps, from entering Preview mode to thorough testing and debugging, you can confidently ensure that GTM is configured correctly and capturing the data you need.
Free essential resources for success
Discover more from Lifesight


