Introduction:
Google Ads provides advertisers with powerful tools to optimize their campaigns and achieve specific business goals. One such tool is Target CPA (Cost Per Acquisition), a bidding strategy designed to help you maximize conversions while maintaining a specific acquisition cost. In this comprehensive guide, we’ll walk you through the step-by-step process of setting up Target CPA in Google Ads, enabling you to drive conversions efficiently and maximize your advertising budget.
Step 1: Log into Your Google Ads Account:
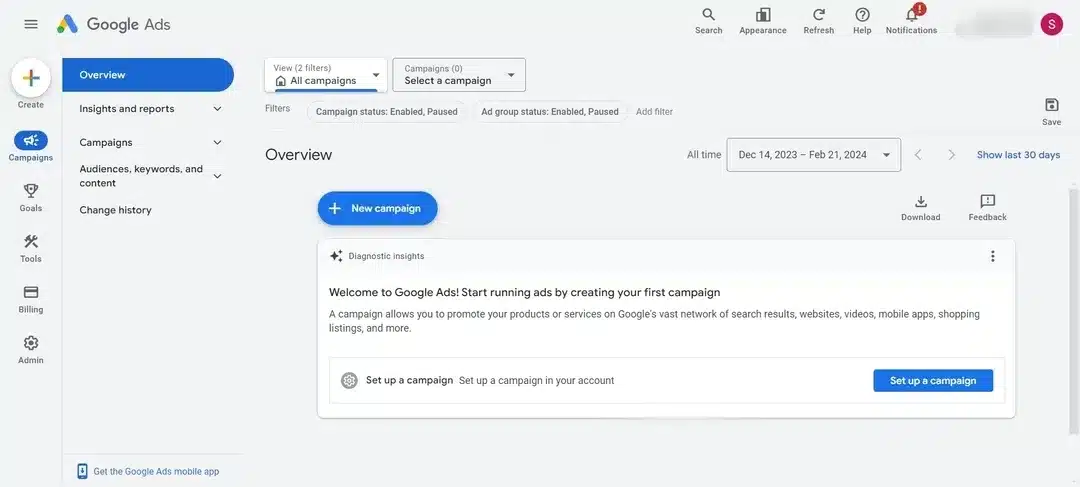
Start by logging into your Google Ads account. If you don’t have an account, you’ll need to create one to access the advertising platform.
sign-in-google-ads-account
Step 2: Navigate to Campaigns:
In your Google Ads dashboard, go to the “Campaigns” tab. This is where you’ll manage your advertising campaigns.
click-on- campaign
Step 3: Select the Campaign:
Choose the specific campaign for which you want to implement Target CPA. Click on the campaign name to enter the campaign settings.
Step 4: Access Bidding Settings:
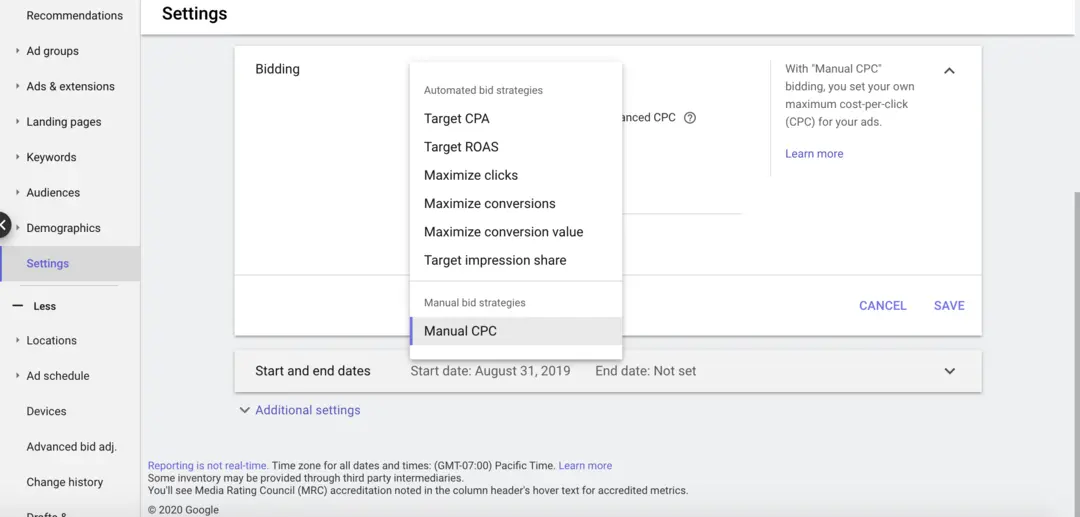
Within the selected campaign, click on the “Settings” tab. Here, you’ll find various campaign settings, including bidding.
Step 5: Click on Bidding:
Under the “Settings” tab, locate the “Bidding” section. Click on it to access the bidding strategy settings for the selected campaign.
select-bidding-strategy-in-google-ads
Step 6: Edit Bidding Strategy:
Once in the bidding settings, find the “Bidding strategy” section. Click on “Edit” to modify your current bidding strategy.
Step 7: Choose Target CPA:
In the bidding strategy options, select “Target CPA” from the list. This indicates that you want to set a specific target cost per acquisition for your campaign.
Step 8: Set Your Target CPA:
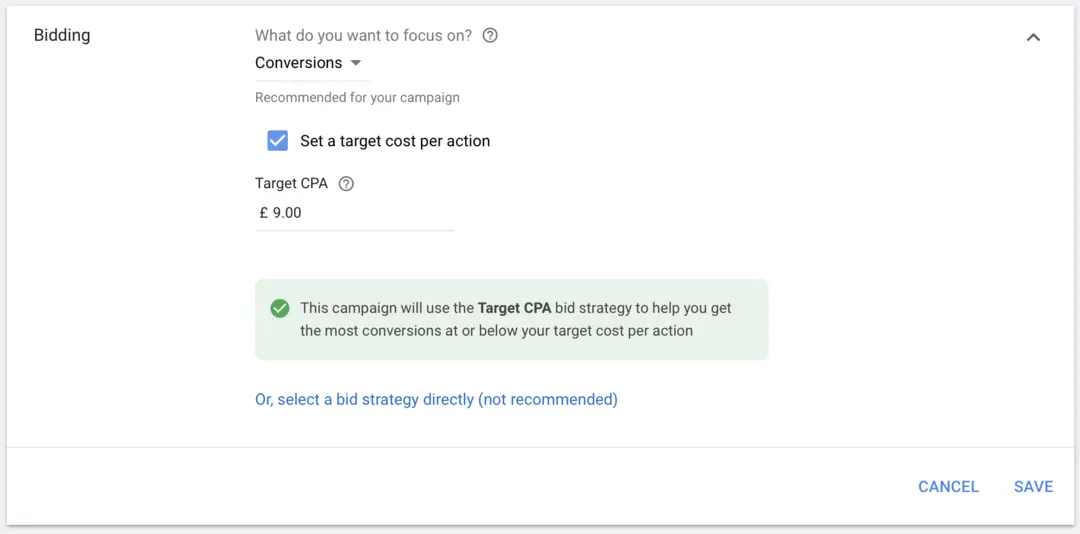
After choosing Target CPA, you’ll be prompted to enter your desired cost per acquisition. Input the amount that aligns with your campaign goals and budget constraints. Google Ads will use this target to optimize your bidding strategy.
set-target-cpa-in-google-ads
Step 9: Review Conversion Tracking:
For Target CPA to work effectively, you must have conversion tracking set up in your Google Ads account. Confirm that your conversion actions are correctly defined, and the tracking code is implemented on your website.
Step 10: Save Changes:
Once you’ve set your target CPA and ensured proper conversion tracking, save the changes to apply the new bidding strategy to your campaign.
Step 11: Monitor Performance:
After implementing Target CPA, closely monitor the performance of your campaign. Assess the number of conversions, the actual CPA, and other relevant metrics in your Google Ads dashboard.
Step 12: Adjust Target CPA as Needed:
Based on the initial performance data, you may need to adjust your target CPA. If the campaign is not meeting your goals, consider gradually increasing or decreasing the target CPA to find the optimal balance between cost and conversions.
Step 13: Utilize Experiments (Optional):
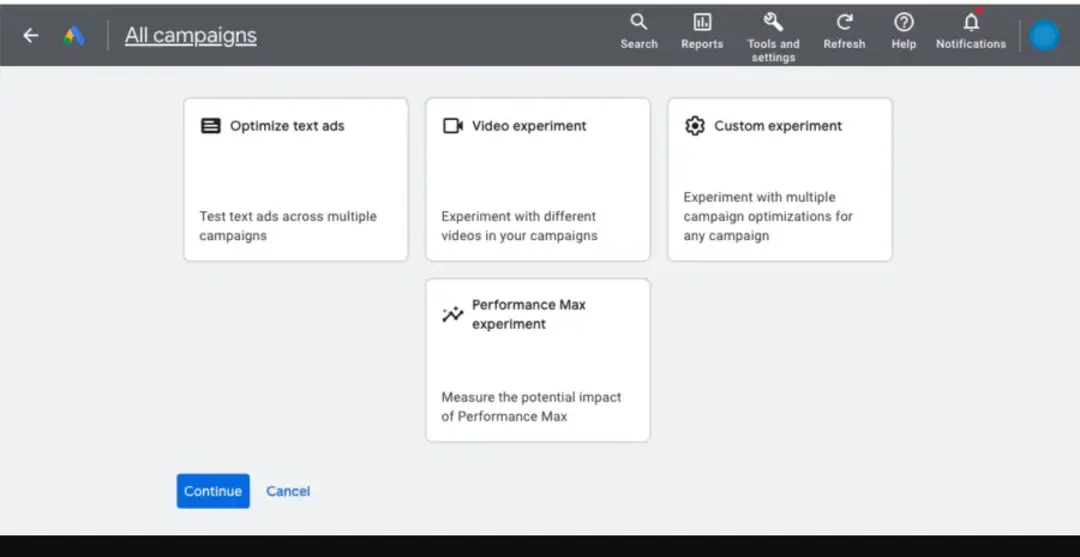
Google Ads offers an experiments feature that allows you to test changes, including bidding strategies, in a controlled environment. Consider using experiments to assess the impact of Target CPA on your campaign performance.
utilize-experiments-in-google-ads
Step 14: Analyze and Optimize:
Regularly analyze the performance data provided by Google Ads. Look for trends, identify areas for improvement, and optimize other campaign elements, such as ad creatives and targeting, to enhance overall performance.
Summary:
Setting Target CPA in Google Ads is a strategic move to ensure efficient use of your advertising budget while achieving your desired conversion goals. By following these steps, from accessing your campaign settings to monitoring and adjusting your target CPA, you can leverage this bidding strategy to maximize the effectiveness of your Google Ads campaigns.
Free essential resources for success
Discover more from Lifesight


