Tracking the success of your ads in terms of conversion is crucial to understanding your campaign performance. Conversion tracking in Google Ads enables you to see what happens after a user interacts with your advertisement, be it making a purchase, filing an application, signing up for newsletter, or any other significant metric. This data helps to make critical decisions on where to invest in advertising. This guide explains the step-by-step process of setting up conversion tracking in Google Ads.
Step 1: Sign in to Google Ads
Start by signing in to your Google Ads account. You need an account to set up and manage conversion tracking.
Step 2: Choose the Right Conversion Action
Navigate to the ‘Tools & Settings’ tab in the top right of the screen and click ‘Conversions.’ Here, you can create a new conversion action or edit an existing one. Consider your business goals and decide what action is most valuable to track.
setup-conversion-tracking
Step 3: Create a Conversion Action
Click the ‘plus’ button to create a conversion action. You’ll be presented with a few options: Website, App, Phone Calls, or Import. If you want to track on-site transactions, for instance, select ‘Website’.
create-a-new-conversion-action
Step 4: Configure Conversion Action Settings
Name the conversion and select a category that best represents the action you’re tracking (Purchase/Sale, Sign-up, Lead, View of a key page, or Other). Set the value, count, conversion window, view-through conversion window, and include in ‘Conversions’ as per your requirements.
Step 5: Set Up the Conversion Tracking Tag
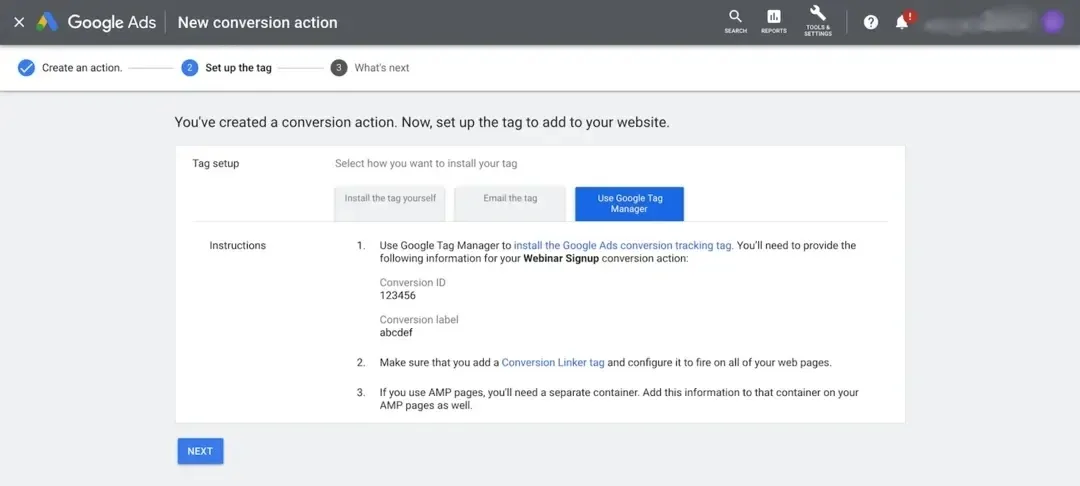
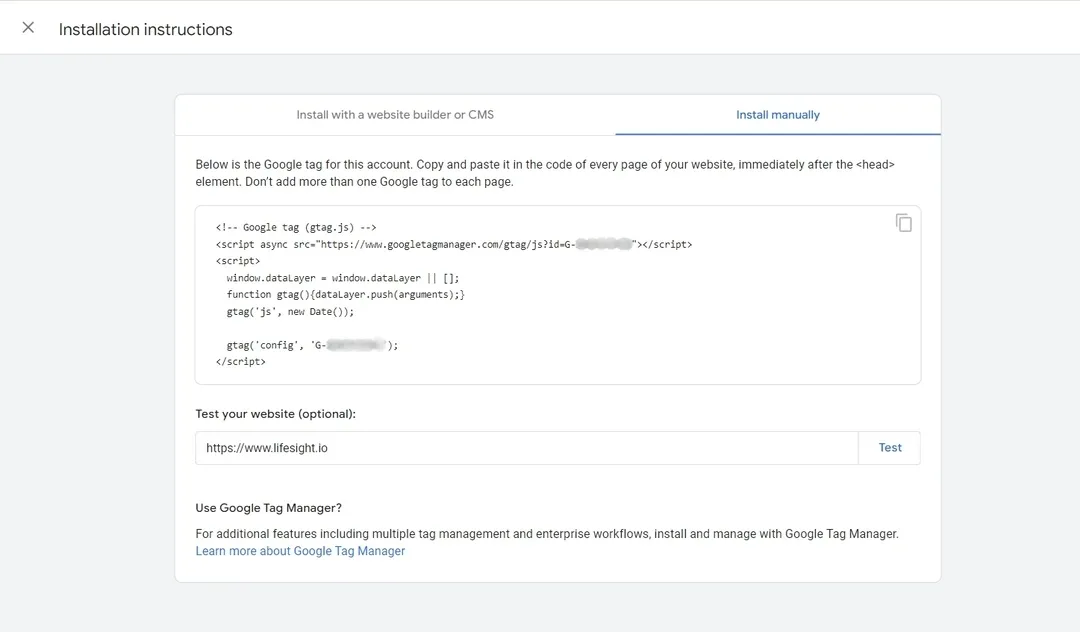
Choose how you want to set up the conversion tracking tag. You can install it yourself, email it to your webmaster, or use Google Tag Manager if you have it configured. If you choose to install the tag yourself, Google will provide you with a global site tag that you’ll need to add to your website.
install-the-global-site-tag
Step 6: Save and Apply the Conversion Action
Once your tag is installed, save the conversion action. Your configured conversion will now appear in the Conversions page. It will start recording data once users start performing the action you’re tracking.
Step 7: Monitor your Conversion Data
You can now monitor your conversion activity on the Conversion actions page. Keep track of and analyze the conversion data regularly, and optimize your ad campaigns based on your observations.
Summary
Setting up conversion tracking in Google Ads can significantly improve your understanding of ad performance, providing insights that can be leveraged to optimize your campaigns. This step-by-step guide simplifies the process, ensuring you have the tools to track and measure crucial conversion data effectively.
Free essential resources for success
Discover more from Lifesight


