Introduction:
Google Tag Manager (GTM) is an invaluable tool for website owners, offering a centralized platform to manage and deploy various tracking codes seamlessly. Installing GTM on Shopify allows you to efficiently implement and update tags without the need for manual code changes. In this comprehensive guide, we’ll walk you through the step-by-step process of installing Google Tag Manager on your Shopify store, empowering you to enhance tracking and gather valuable insights.
Step 1: Create a Google Tag Manager Account
If you don’t already have a Google Tag Manager account, visit Google Tag Manager and sign in with your Google account. Click on “Create Account” and follow the prompts to set up your GTM account.
Step 2: Create a New Container
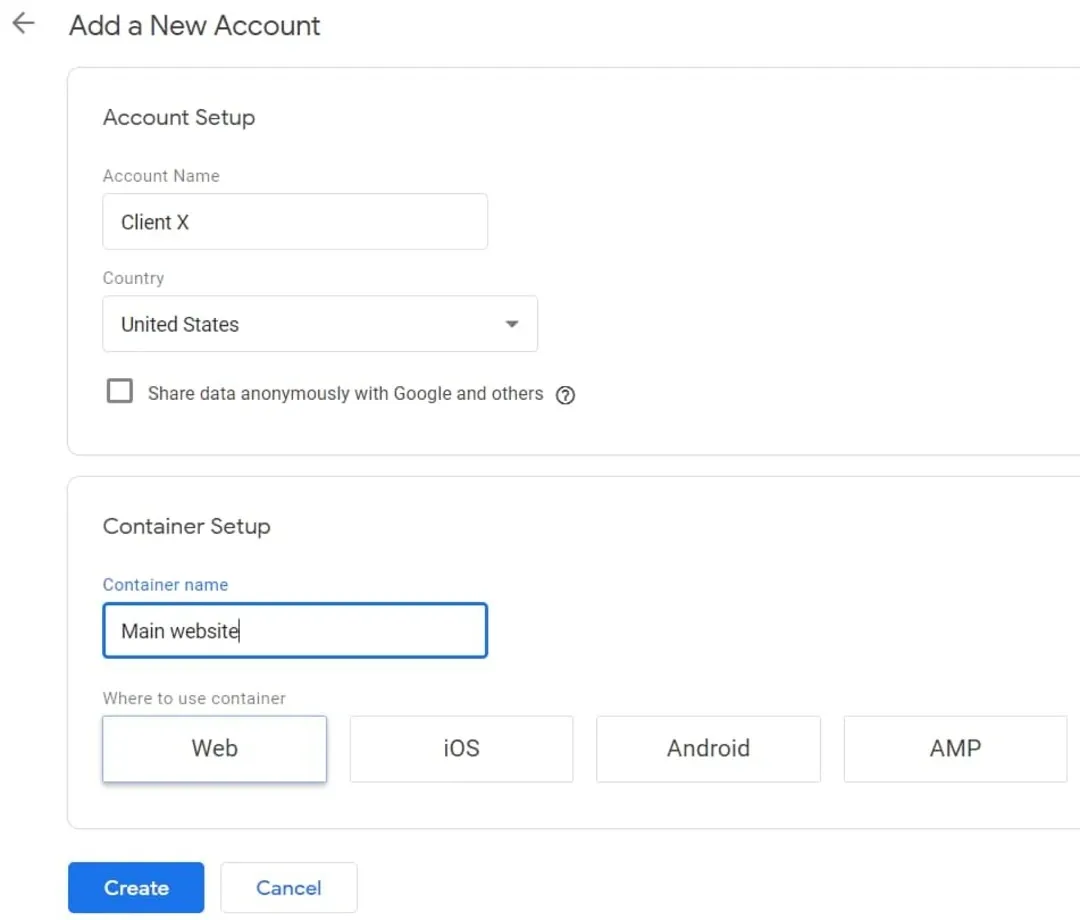
After creating your GTM account, click on the “Create Container” button. Enter a name for your container, specify the target platform as “Web,” and click “Create.” This container will hold your tags and scripts.
create-a-new-container
Step 3: Retrieve GTM Container Code
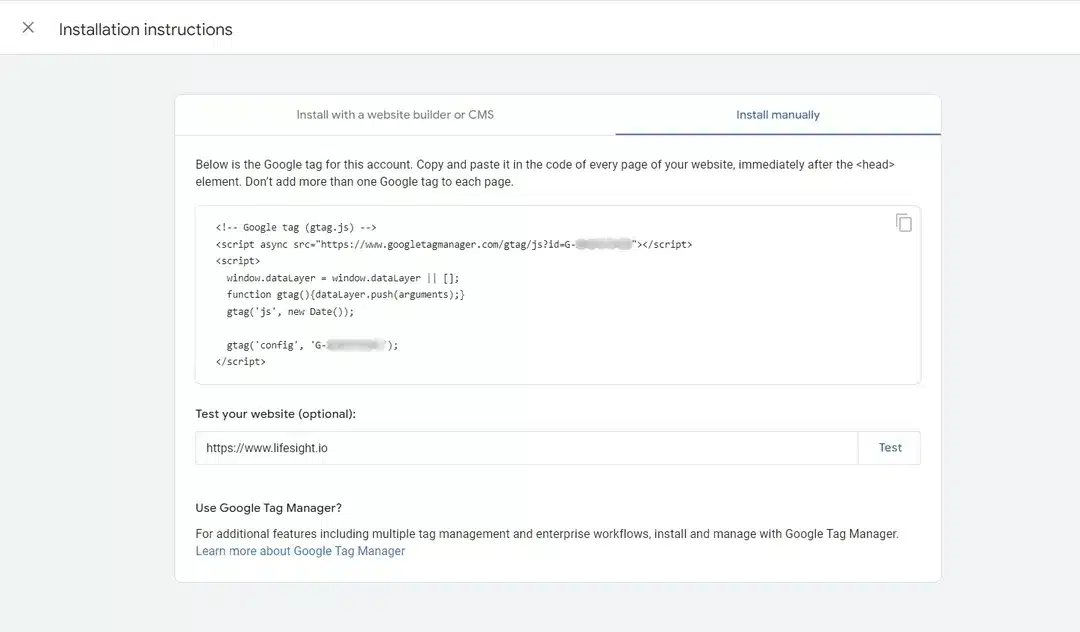
Once your container is created, you’ll be presented with a snippet of code. Copy this code as you’ll need to add it to your Shopify store. The code consists of both a head and body section, which you’ll later insert into your Shopify theme.
retrieve-GTM-container-code
Step 4: Log in to Your Shopify Admin
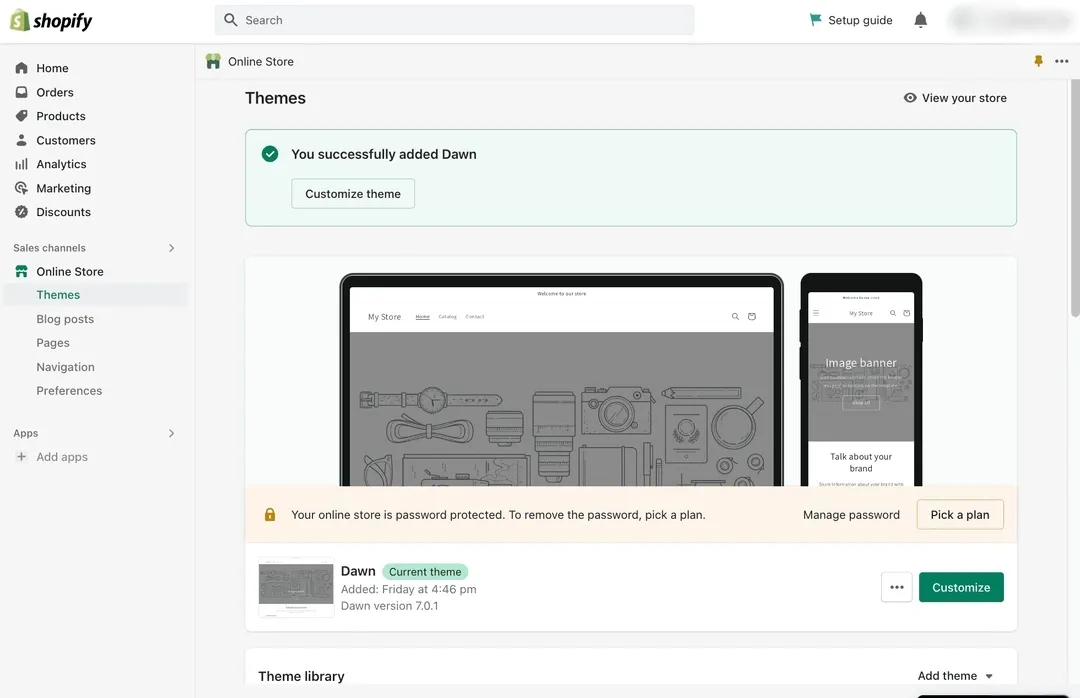
Access your Shopify admin panel by logging in to your Shopify account. Navigate to the “Online Store” section.
login-to-your-shopify-admin
Step 5: Go to Themes
In the “Online Store” section, click on “Themes.” Here, you’ll find the themes that are currently installed on your Shopify store.
click-on-themes-tab-in-shopify
Step 6: Edit Code
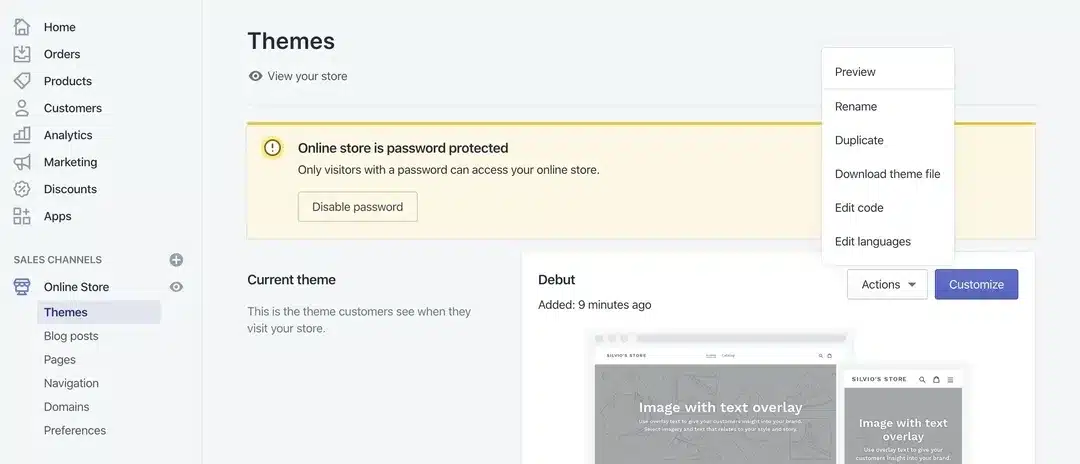
In the “Themes” section, locate the “Actions” dropdown and select “Edit Code.” This will take you to the backend of your Shopify theme.
edit-code-in-shopify
Step 7: Insert GTM Code into Theme
Within the code editor, find the theme.liquid file. Open this file and paste the GTM container code you copied earlier. Place the code snippet just after the opening <head> tag for the head section code and just after the opening <body> tag for the body section code.
Step 8: Save and Publish Changes
Once you’ve added the GTM container code to your theme.liquid file, save the changes. Shopify will prompt you to confirm the modifications. Click “Save” and “Publish” to make the changes live on your Shopify store.
Step 9: Verify GTM Installation
To ensure the successful installation of GTM, visit your Shopify store and right-click on the page. Select “View Page Source” or use browser developer tools to inspect the source code. Confirm that the GTM container code is present in both the head and body sections.
Step 10: Set Up Your First Tag
Go back to your GTM account. Click on your container and then “Add a new tag.” Follow the prompts to configure your first tag, whether it’s for Google Analytics, Facebook Pixel, or any other tracking script. Assign triggers based on your tracking requirements.
Summary
Installing Google Tag Manager on Shopify streamlines the process of managing and deploying tracking codes, empowering you to gain deeper insights into user behavior. By following these steps, from creating a GTM account to verifying the installation and setting up your first tag, you’ve taken a significant step toward efficient analytics and enhanced tracking capabilities.
Free essential resources for success
Discover more from Lifesight


