In the digital age, one of the most effective ways to reach your target audience is through geo-targeting in online advertising. Geo-targeting, or local PPC, allows businesses to send their messages to users based on their geographic location. This technique is incredibly valuable in ecommerce and digital marketing, as it enables companies to tailor content, ads, and marketing efforts to specific audiences based on their geographical locations, thereby increasing relevance and potential engagement. One platform that excels in this capability is Facebook, with its robust advertising network. Below is a comprehensive step-by-step guide on how to implement geo-targeting for your Facebook ads.
Step 1: Define Your Campaign Objectives
Before you dive into the technicalities of setting up geo-targeted ads, it’s crucial to clearly define your campaign objectives. Are you looking to drive traffic to your website, increase brand awareness within a specific city, or promote a location-specific sale? Your objectives will dictate how you structure your geo-targeted ads.
Step 2: Access Facebook Ads Manager
All Facebook ad campaigns are managed through the Facebook Ads Manager tool. To access it, log into your Facebook account, select “Ads Manager” from the left panel.
Step 3: Create a New Campaign
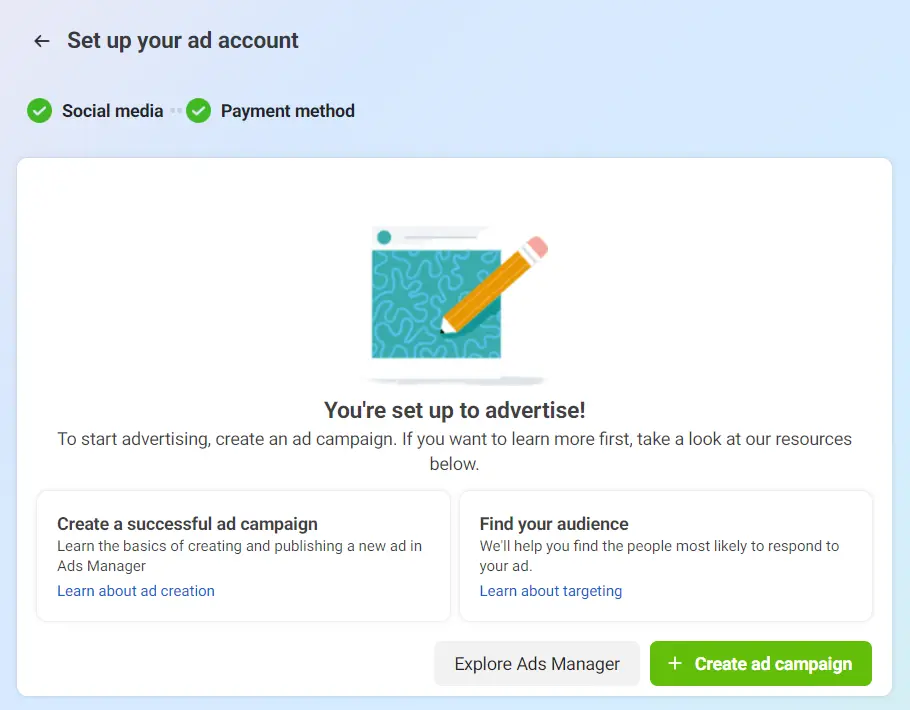
Once in Ads Manager, click the “+ Create” button. This action takes you to the campaign level where you’ll select your campaign objective based on your predefined goals. These objectives could range from brand awareness, reach, traffic, engagement, app installs, conversions, and more.
Create-ad-campaign-in-fb-ads-manager
Step 4: Set Up Ad Set and Audience
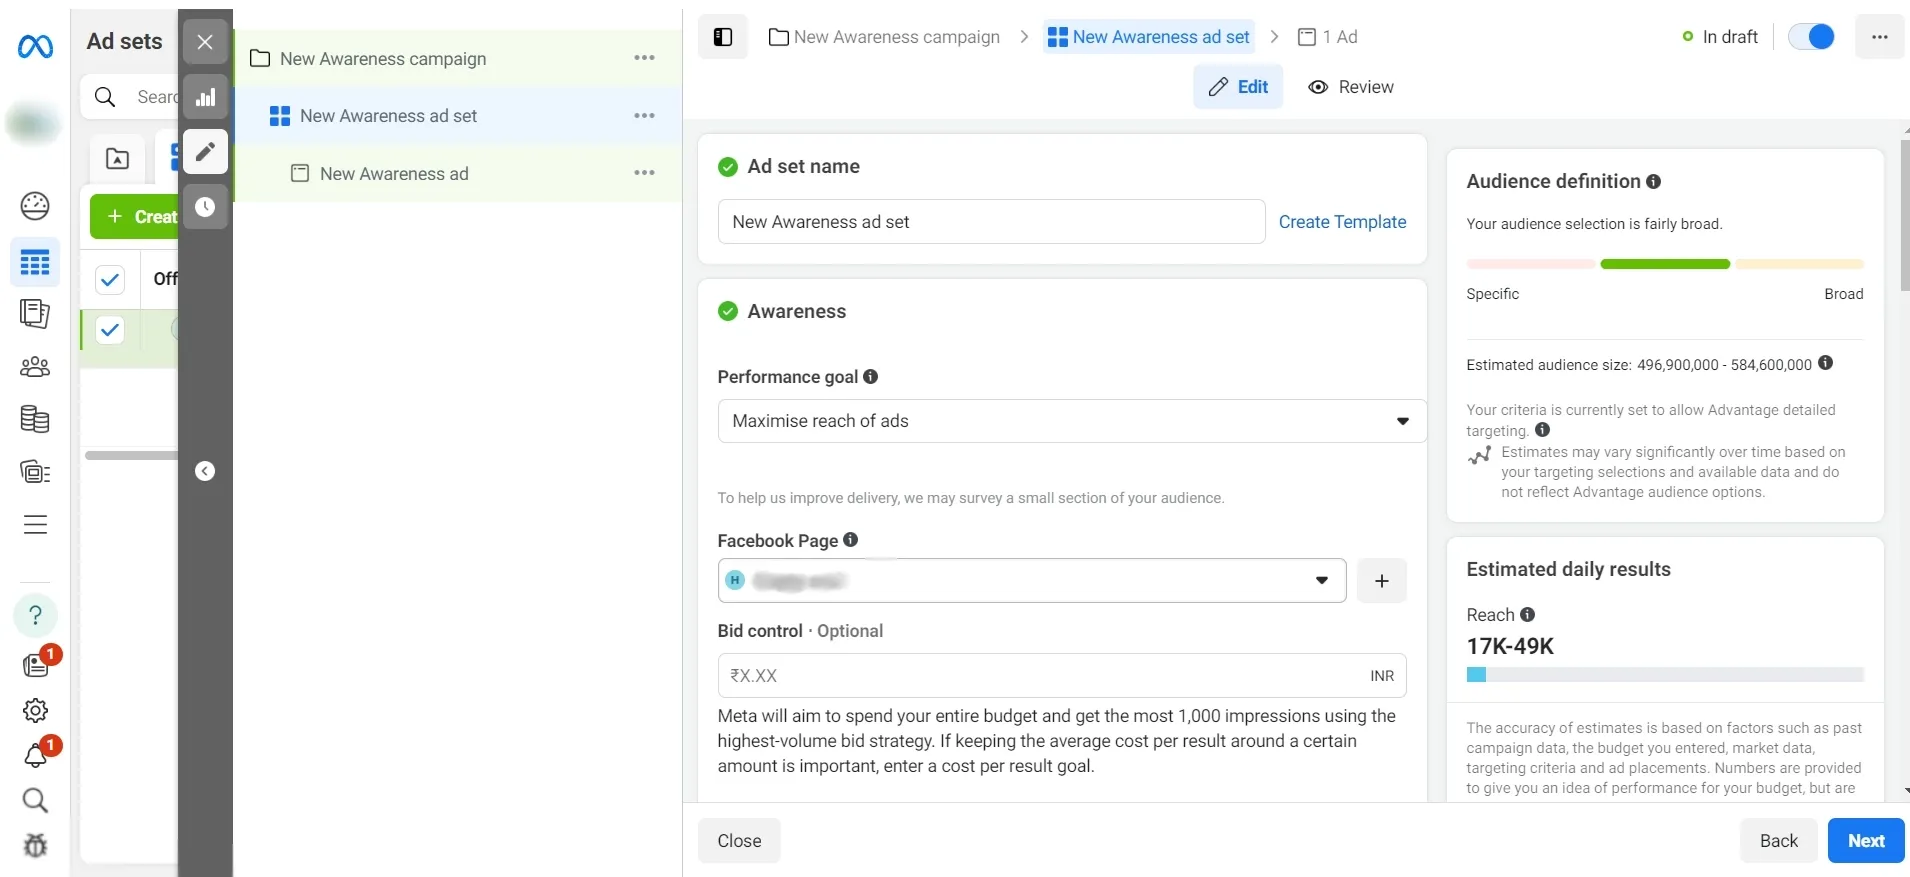
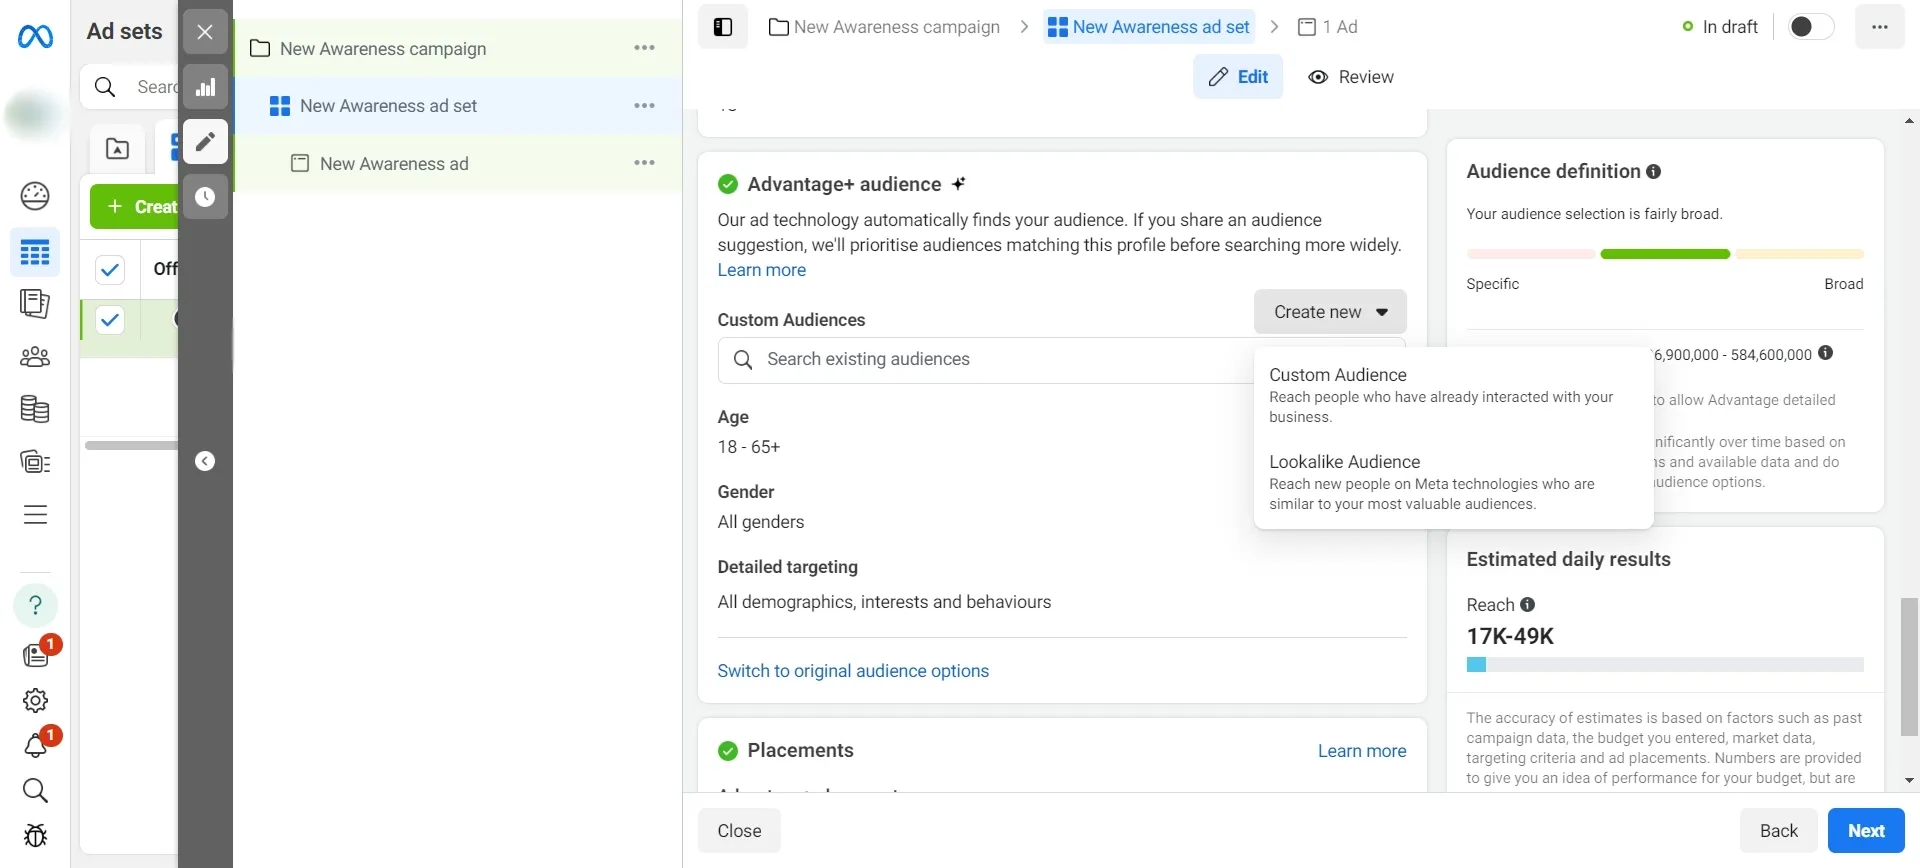
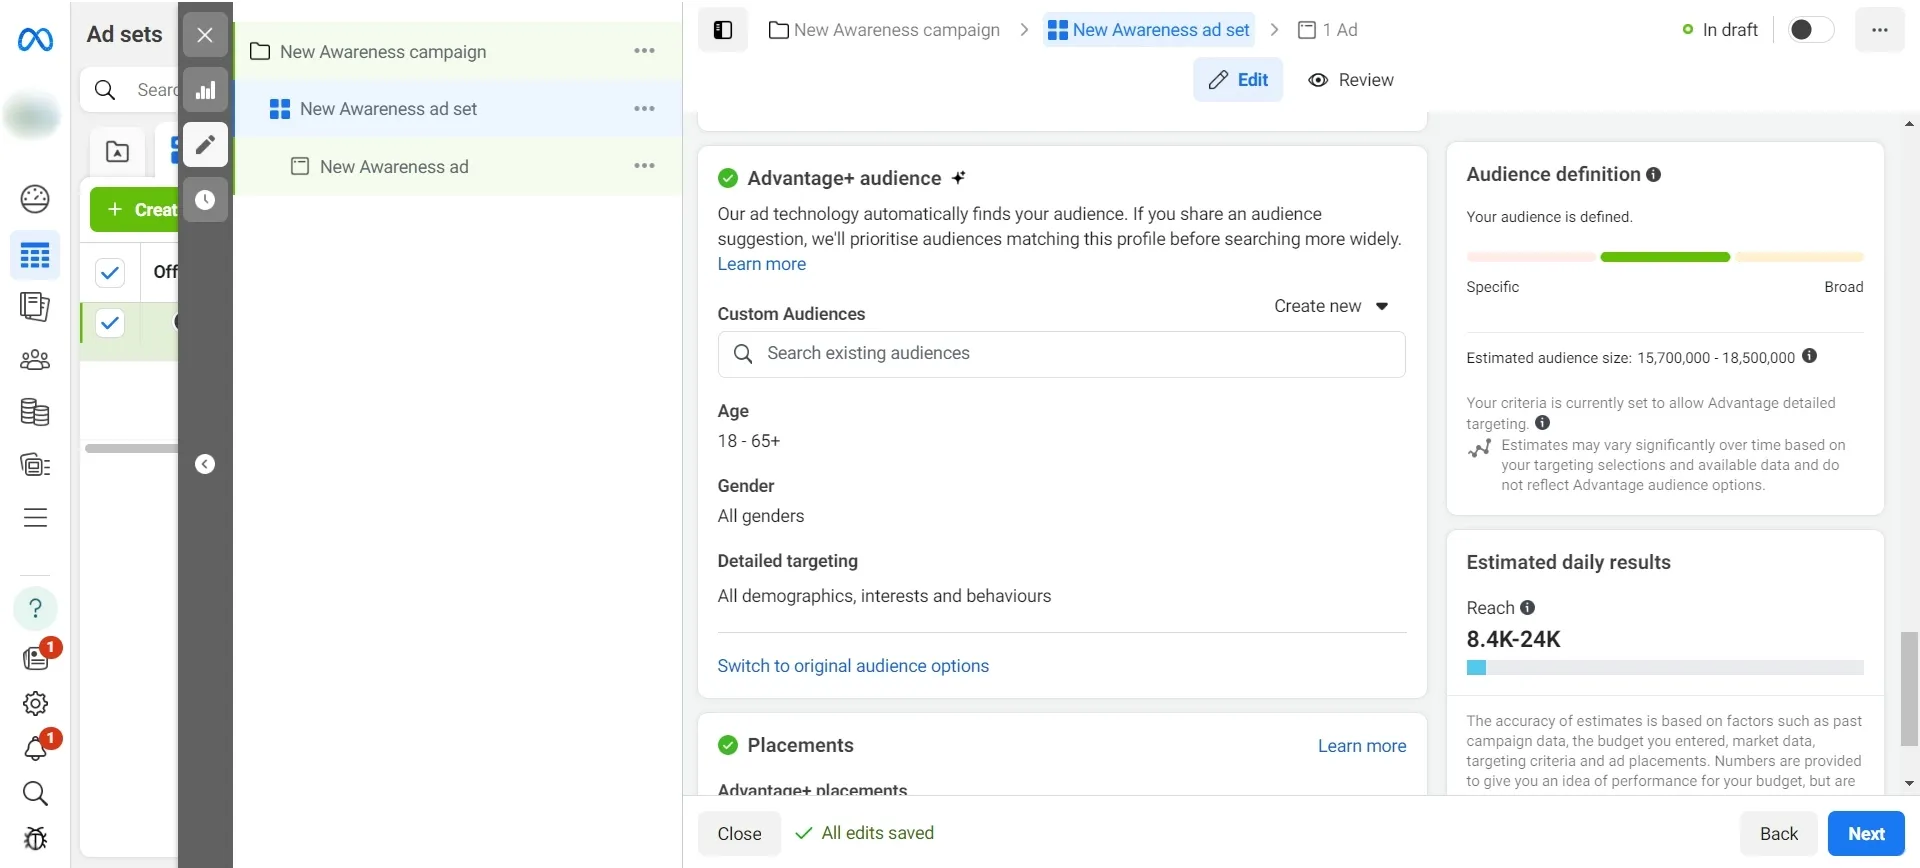
After defining your campaign objective, you’ll proceed to the “Ad Set” level. Here, you define your audience, budget, and schedule. Under the “Audience” section, you’ll find options for creating a new audience or using a saved audience. For geo-targeting, you’ll need to create a new audience.
set-up-ad-set-in-fb-ads-campaign
create-new-audience-in-fb-ads-manager
Step 5: Define Your Geographic Parameters
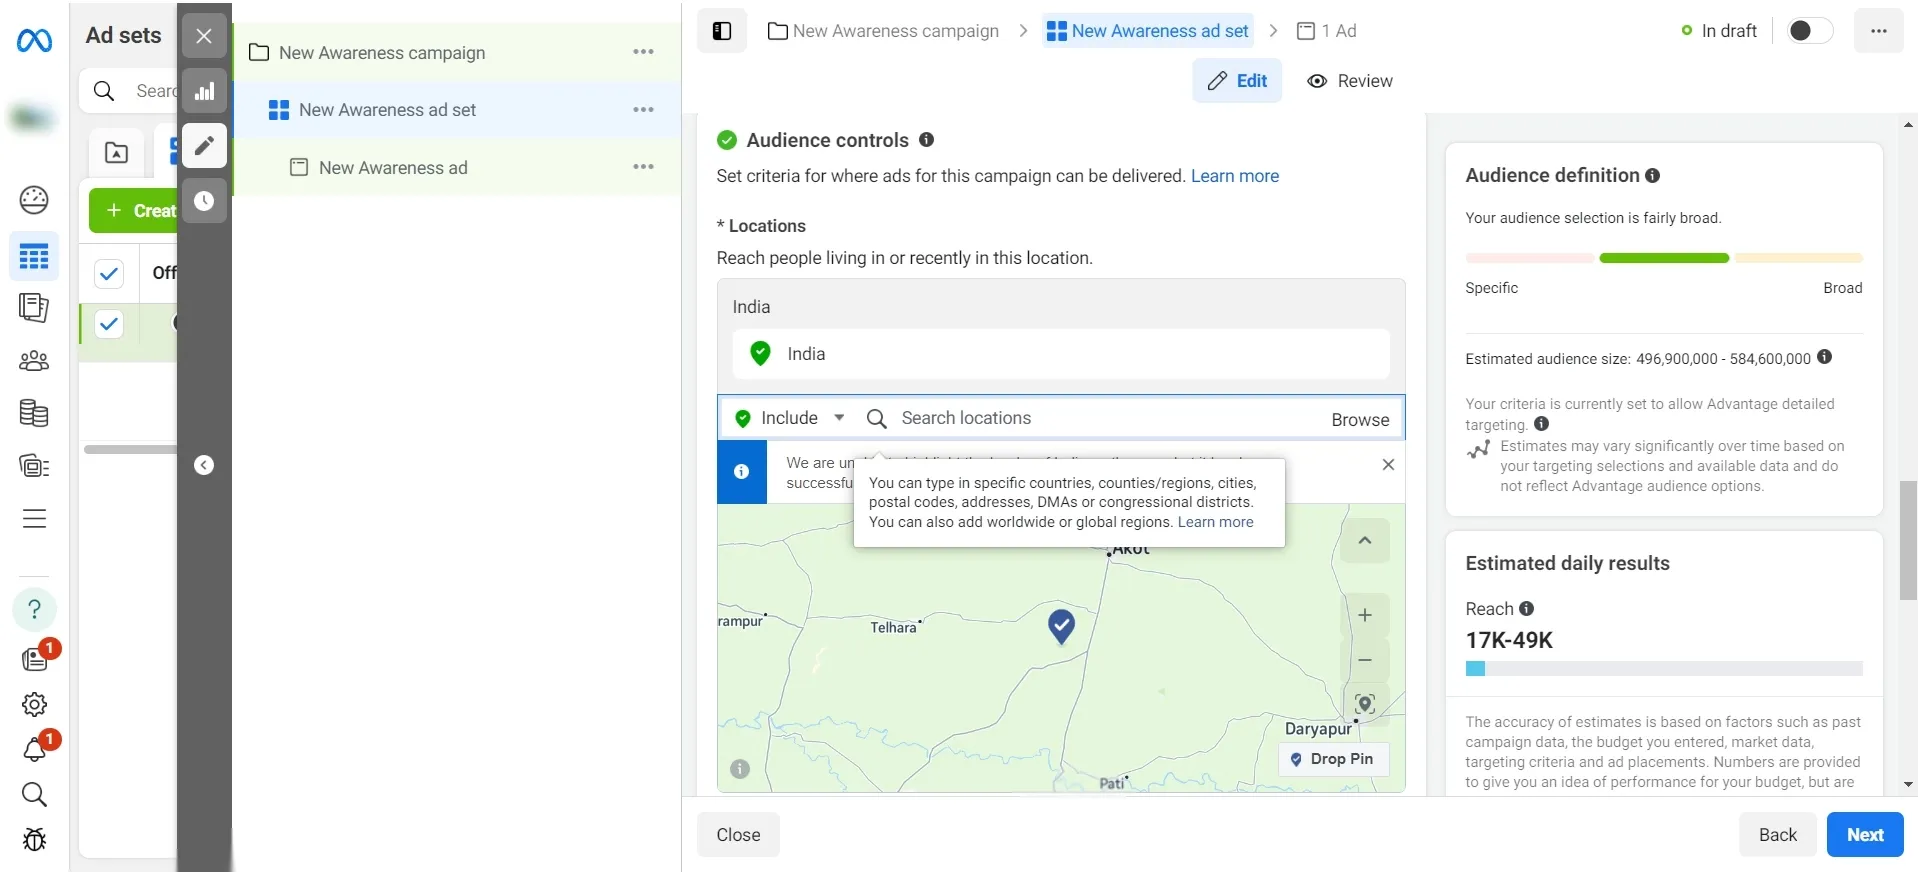
In the “Locations” field, enter the geographic areas you want to target. Facebook allows you to get quite specific; you can target by country, state, city, postal code, or even drop a pin on a specific radius. For advanced strategies, consider using the “Include” and “Exclude” options to refine your audience further, especially if you want to target multiple locations or exclude certain areas within a larger target region.
define-your-geographic-parameters-in-fb-ad-set
Step 6: Adjust Additional Targeting Criteria
While location is key, don’t forget other targeting parameters like age, gender, languages, and detailed targeting (demographics, interests, and behaviors). Combining these with geo-targeting helps you narrow down your audience to a more defined user group.
additional-targeting-criteria-in-fb-ad-set
Step 7: Set Budget and Schedule
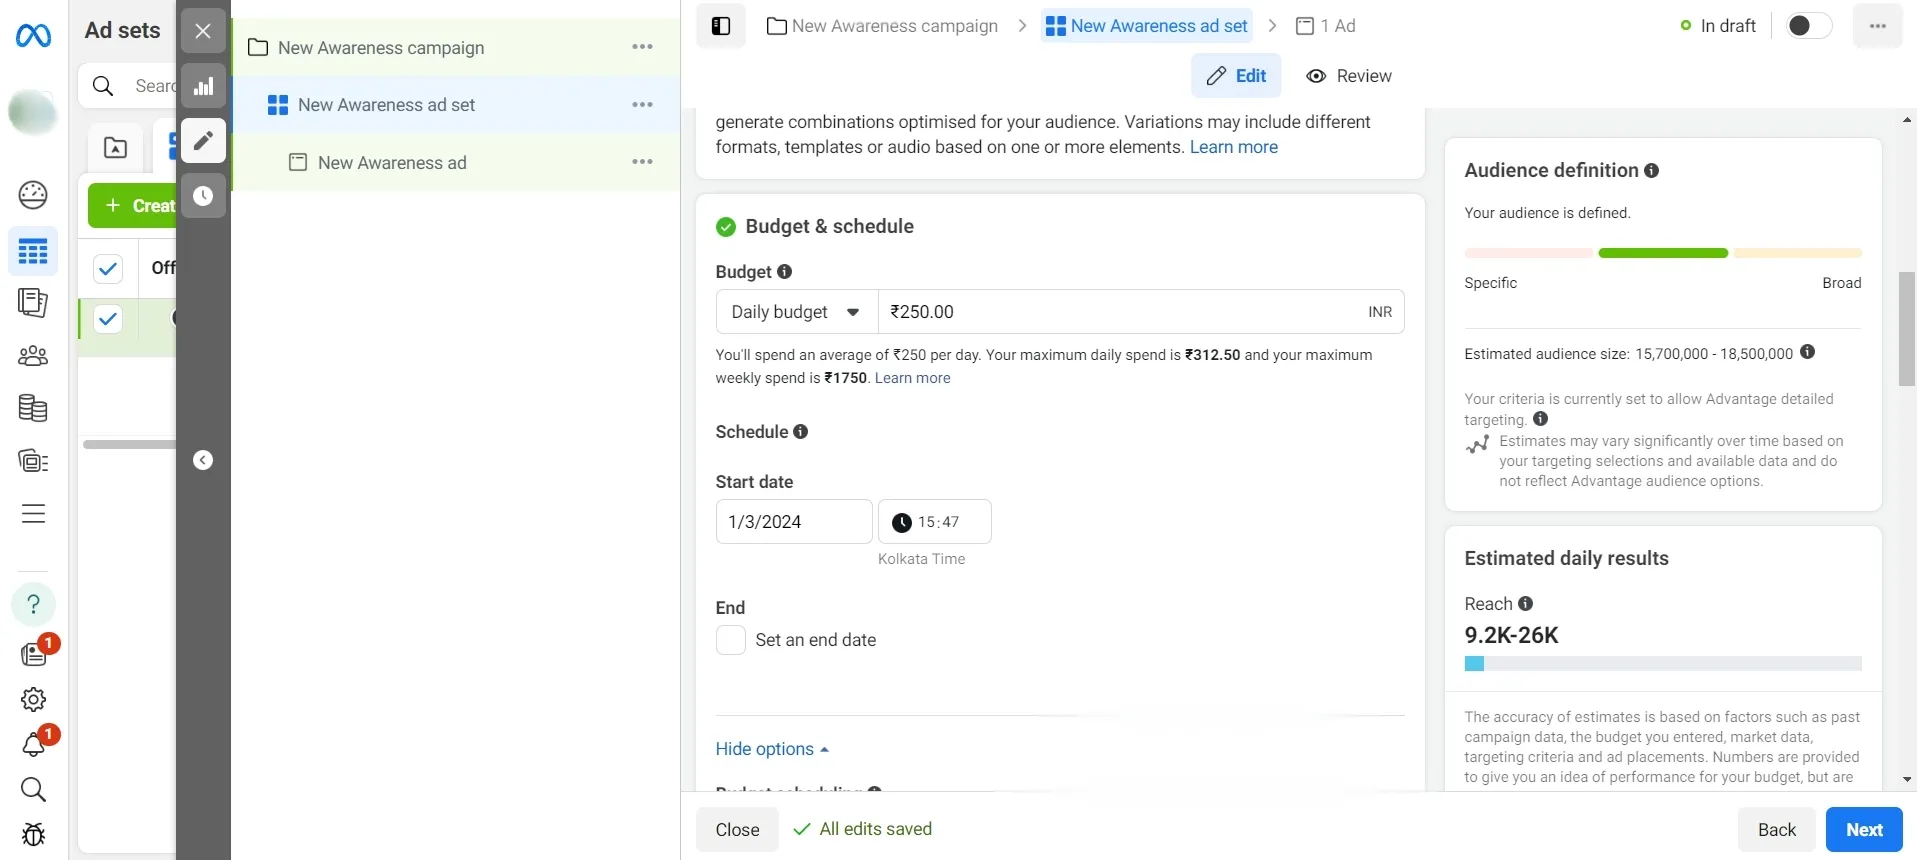
Decide how much you want to spend and how long you want your ads to run. Facebook offers a daily or lifetime budget for maximum flexibility. Ensure your budget aligns with your campaign objectives and the size of the audience you’re targeting.
set-budget-and-schedule
Step 8: Create Your Ad
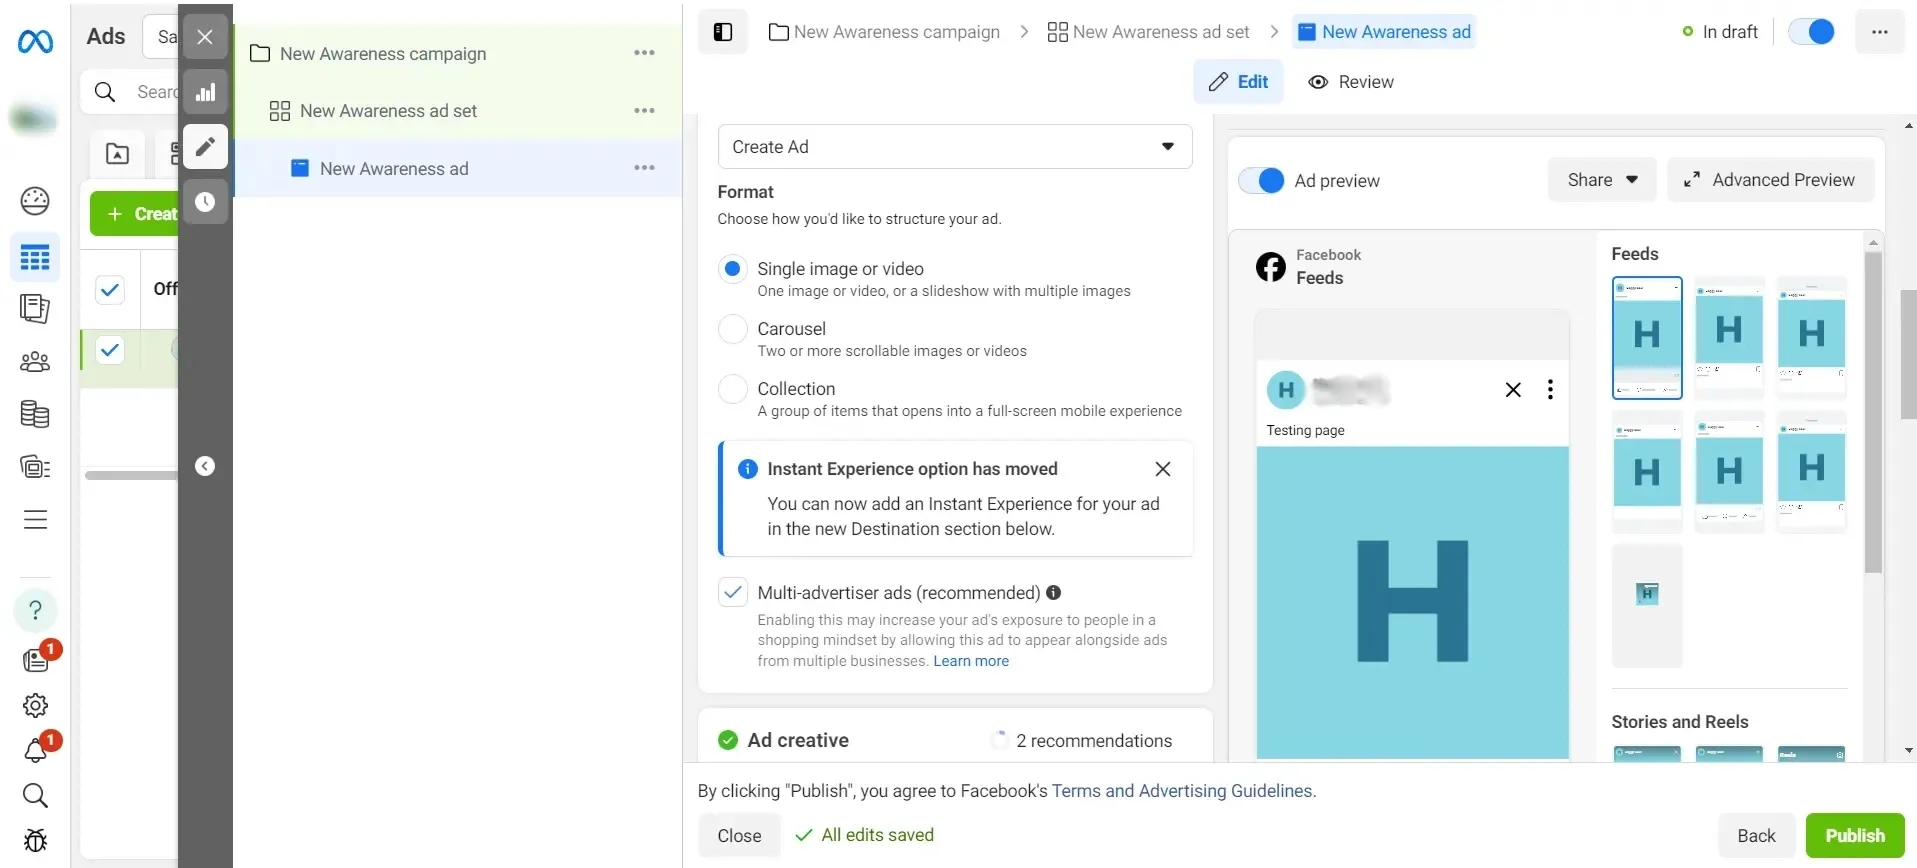
Now, proceed to the “Ad” level. Choose your ad format (single image, video, carousel, etc.), and input all relevant information, including your ad’s text, links, and call-to-action (CTA) button. Ensure your ad creative and message match the geographic area you’re targeting for increased relevance.
create-your-ad-in-fb-ads-campaign
Step 9: Review and Launch
Review your ad settings to ensure everything aligns with your campaign goals, and then click “Confirm” to submit your ad. It will go through Facebook’s ad review process before going live.
Step 10: Monitor and Optimize
After your ad is live, continuously monitor its performance. Use Facebook Ads Manager’s metrics to analyze if your geo-targeting efforts are successful. Pay attention to metrics like reach, impressions, click-through rate (CTR), conversion rate, and return on ad spend (ROAS). Don’t hesitate to make adjustments to your ad components or targeting parameters to optimize performance.
Summary:
Geo-targeting on Facebook is a powerful tool for businesses looking to reach a location-based audience. By following these steps, you can create precise, targeted ad campaigns that speak directly to the interests and needs of potential customers in specific areas. Remember, the key to a successful ad campaign lies not just in setup but also in continuous monitoring and optimization to ensure maximum effectiveness and ROI.
Free essential resources for success
Discover more from Lifesight
