In the realm of e-commerce and digital marketing, accurate data is the cornerstone of strategic decision-making. Google Analytics stands as one of the most powerful tools for understanding website traffic, yet its data can easily be skewed by internal traffic from your company, leading to misleading insights. This comprehensive guide will provide a step-by-step process to filter internal traffic in Google Analytics, ensuring the purity of your data for more precise, actionable analytics.
Step 1: Understanding the Importance of Filtering Internal Traffic
Internal traffic includes all visits to your website from people within your organization. This might be you, your team members, or anyone else accessing the website from within your company’s network. Not filtering these visits can significantly distort your analytics, leading to inaccurate data on user behavior, site performance, and conversion rates.
Step 2: Identifying Internal IP Addresses
Before setting up the filter, you need to identify all the IP addresses used by your organization:
Ask your IT department for a list of all public IP addresses used by your company.
If you’re a smaller team, you might be using a single IP address. Visit “WhatIsMyIP.com” to determine your IP address.
Step 3: Creating a New View in Google Analytics
Log into Google Analytics.
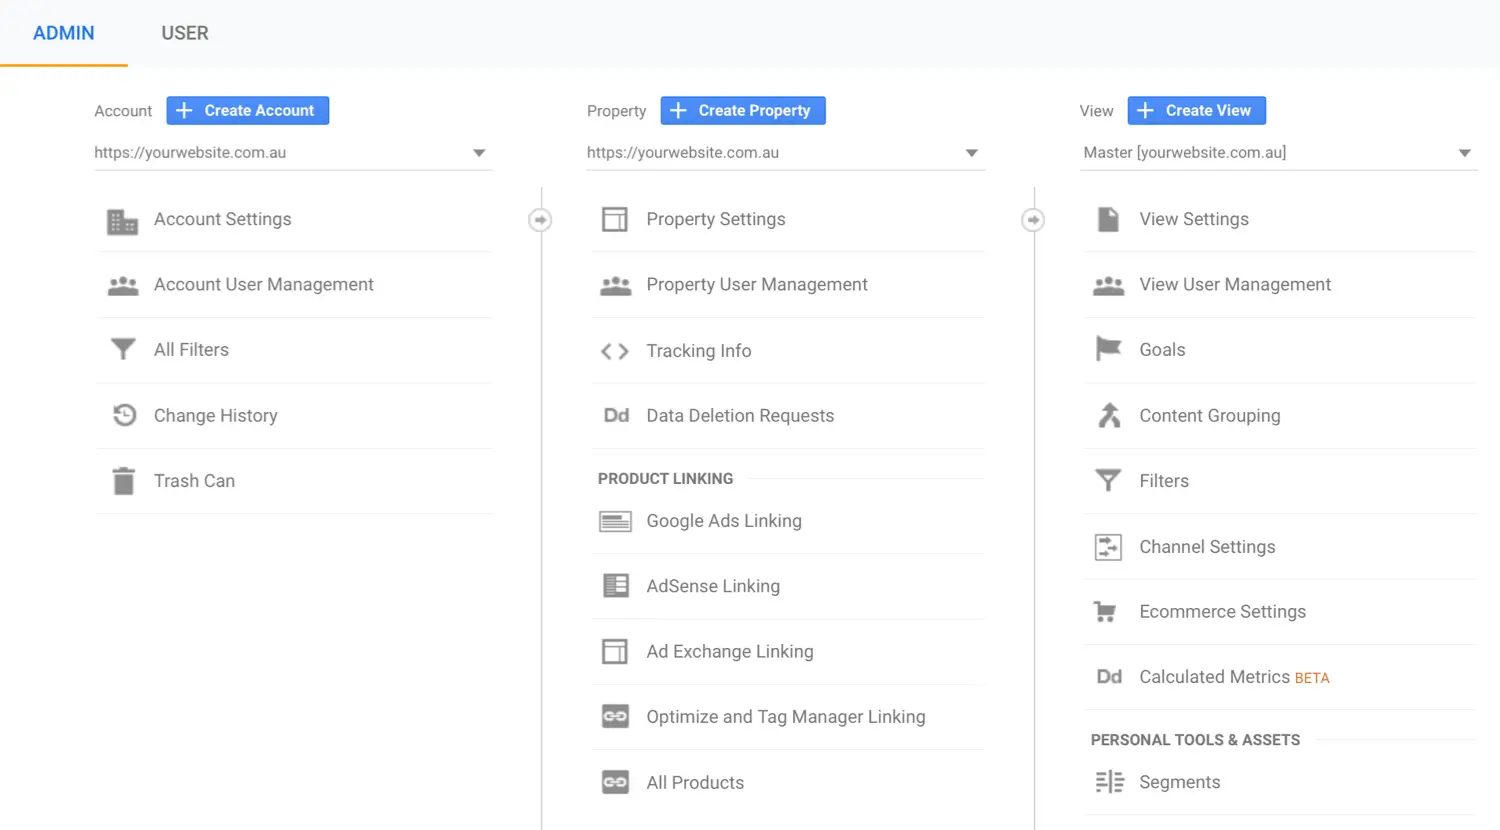
Click “Admin” in the lower-left corner.
In the “View” column, select the dropdown menu, then click “Create new view.”
Select “Website” as your view type, name your view (e.g., “Filtered View”), and set your reporting time zone.
Click “Create View.”
click-on-create-view-in-google-analytics
Step 4: Setting Up the IP Filter
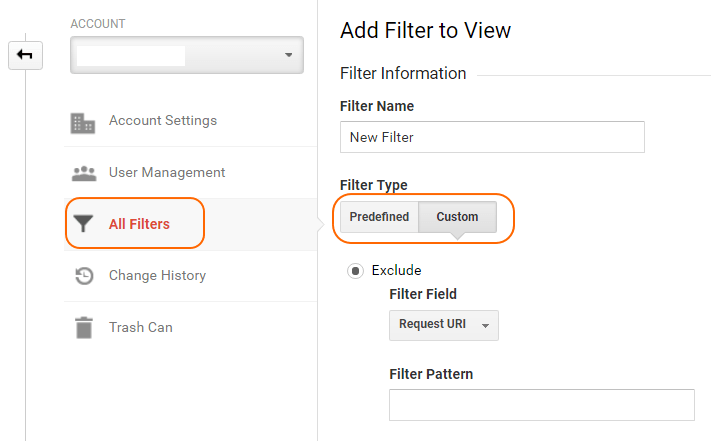
In the “Admin” panel, with your new view selected, click “Filters” then “Add Filter.”
Name your filter (e.g., “Exclude Internal Traffic”).
Choose “Custom” for Filter Type.
Select “Exclude” and from the “Select source or destination” dropdown, choose “traffic from the IP addresses.”
In the “Select expression” dropdown, select “that are equal to.”
Enter the IP address you identified in Step 2.
Click “Save.”
Note: If you have multiple IP addresses, you’ll need to create multiple filters or use regular expressions to exclude all relevant IPs.
setting-up-filter-in-google-analytics
Step 5: Verifying Your Filter
After setting up the filter, it’s crucial to ensure it’s working correctly:
Visit your website from the company network.
In Google Analytics, go to “Real-Time” reports.
Check if your visit is recorded. If the filter is set up correctly, you shouldn’t see your visit.
Step 6: Regular Maintenance for Dynamic IPs
If your company uses dynamic IP addresses, they will change over time. Regularly check with your IT department for any changes in the IP addresses and update your filters accordingly to maintain data accuracy.
Summary
Filtering internal traffic from Google Analytics is paramount for e-commerce and digital marketing professionals seeking reliable data. By excluding internal traffic, you ensure your analytics precisely reflect genuine customer behavior and site performance, leading to more informed decision-making. This guide provides a systematic approach to setting up and maintaining this crucial filter. Remember, the efficacy of your analytics is only as reliable as the data you feed them, and ensuring their integrity is an ongoing commitment.
Free essential resources for success
Discover more from Lifesight


