Introduction
Losing a Facebook ad campaign, whether due to accidental deletion or technical mishap, can be a frustrating experience for marketers. Ad campaigns represent significant investments in time, effort, and budget, so restoring them swiftly and effectively is crucial. Fortunately, Facebook Ads Manager provides mechanisms to help you recover deleted campaigns. This guide will walk you through the step-by-step process to restore a deleted campaign in Facebook Ads Manager, ensuring you can quickly get back on track with your advertising efforts.
Step 1: Access Your Facebook Ads Manager
To begin the recovery process, log into your Facebook Ads Manager account. This can be done by navigating to the Facebook homepage and selecting “Meta Suite” from the drop-down menu, or by directly visiting the Ads Manager URL. Ensure you are logged into the account associated with the deleted campaign.
Step 2: Navigate to the Campaigns Tab
Once inside Ads Manager, navigate to the “Campaigns” tab. This tab displays all the campaigns you have created, including those that are active, paused, or deleted. It’s essential to ensure you’re viewing all possible campaigns to locate the deleted one.
navigate-to-the-campaigns-tab-in-facebook
Step 3: Use the Filters to Find Deleted Campaigns
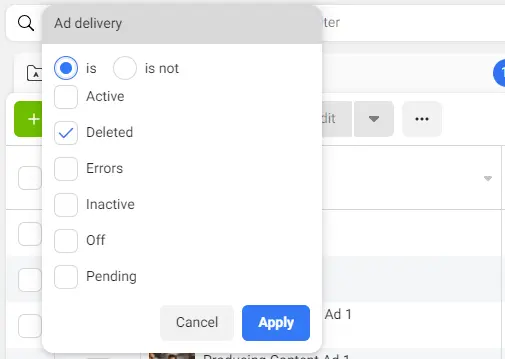
Facebook Ads Manager includes a variety of filters to help you find specific campaigns. Click on the “Filters” button, and in the drop-down menu, select “Deleted.” This filter will display all campaigns that have been deleted, making it easier to identify the one you want to restore.
Use the Filters to Find Deleted Campaigns
Step 4: Select the Deleted Campaign
After applying the filter, locate the deleted campaign from the list. Click on the checkbox next to the campaign’s name to select it. If you cannot find the campaign, double-check the date range in your filters to ensure it encompasses the period during which the campaign was active and subsequently deleted.
Step 5: Access the Campaign’s Settings
With the deleted campaign selected, click on the “Edit” button to access its settings. This action will open a new window displaying the campaign’s details, including its ad sets and ads.
Step 6: Duplicate the Campaign
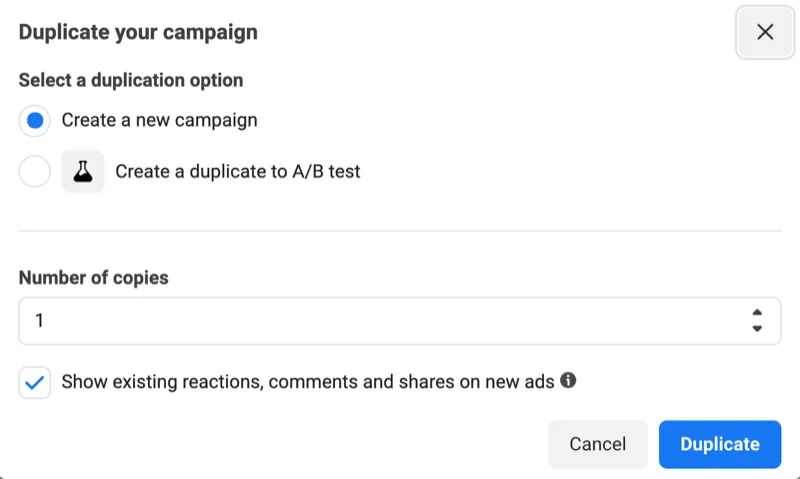
Since deleted campaigns cannot be directly restored, the workaround is to duplicate the campaign. In the campaign settings window, find the “Duplicate” button and click it. This action will create a copy of the deleted campaign, including all its ad sets and ads.
duplicate-campaign-facebook
Step 7: Review and Adjust the Duplicated Campaign
After duplicating the campaign, a new window will appear where you can review and adjust the campaign settings. Ensure all details, such as the campaign objective, budget, targeting options, and creatives, are correct. You can make any necessary adjustments to align with your current advertising goals.
Step 8: Publish the Duplicated Campaign
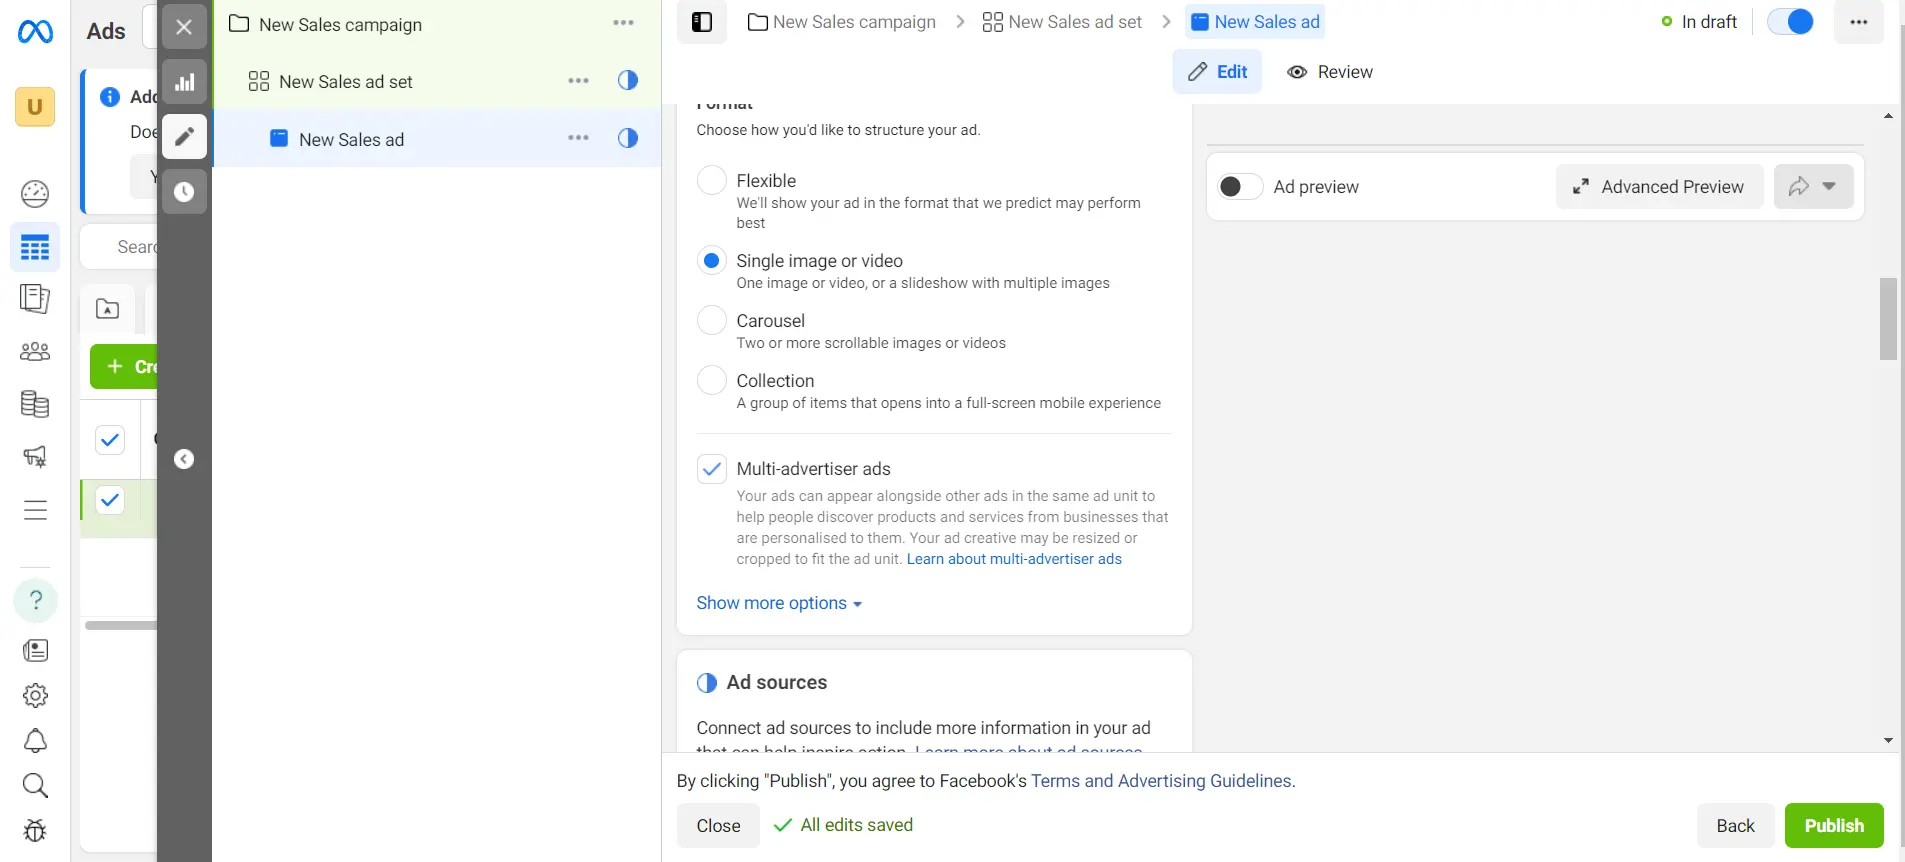
Once you are satisfied with the duplicated campaign’s settings, click the “Publish” button to activate it. The campaign will now appear in your Ads Manager as a new active campaign, effectively restoring the original deleted campaign’s structure and settings.
Publish-the-duplicated-facebook-campaign
Step 9: Monitor the Restored Campaign
After publishing, closely monitor the newly restored campaign to ensure it is performing as expected. Check metrics such as impressions, clicks, conversions, and cost per result to verify that the campaign is running smoothly and achieving your advertising objectives.
Summary
Accidentally deleting a Facebook ad campaign can be a setback, but by following these steps, you can efficiently recover and relaunch your campaign. Remember to utilize the filtering options in Ads Manager to locate deleted campaigns and use the duplication feature to recreate them. Monitoring the restored campaign will help ensure its success. With this guide, you can minimize disruptions and continue driving your marketing efforts forward.
Free essential resources for success
Discover more from Lifesight


